


Cooler Master Hyper N520 Heatsink

Installation and Test setup
Â
To start putting the N520 through its paces, the first step was to install the cooler into a real life test set up. The system used for this comprised of the following parts:
Â
Intel Core 2 Duo E7200
DFI DK P45
2GB Crucial Balistix
4850X2
Seasonic M12 600w
DFI DK P45
2GB Crucial Balistix
4850X2
Seasonic M12 600w
Â
So on with the installation, and this is where I hit a little hick up. There was no manual, or instruction sheet about how to correctly assemble the mass of mounting hardware provided with the cooler. So I spent a few minutes trying various combinations and came up with what I hope is the correct mounting procedure.
Â
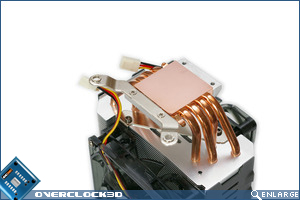
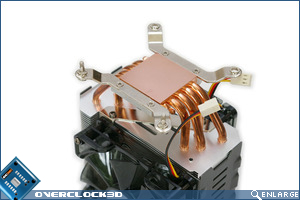
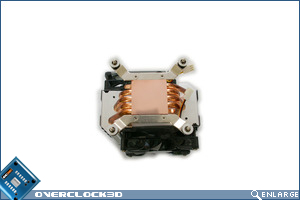
1. Attach the desired mount bracket to the cooler’s base with the small screws
2. Screw in the main mounting bolts. Note these are a reverse thread.
3. Mount the larger of the rubber washers on the underside of the mounting bracket, white edge down.
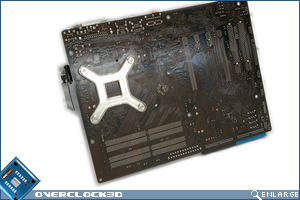
4. Fit the cooler to the board (not forgetting TIM of course) by attaching the nuts on the underside, with the correct back plate.
Â
Â
Â
I felt this wasn’t the most gracious of installation methods, it was a little tricky holding the board and cooler upside down to fit the nuts and back plate. But after the first two were in and tightened enough to hold everything in place it wasn’t too difficult to complete. Once mounted however the cooler certainly wasn’t going anywhere, the mount was easily enough to pick up the setup by safely.
Â
Â
Test methodology
Â
The first test conducted was the tried and tested ‘strap the cooler to a chip and see how it fairs’ method. The N520 was tested using the E7200 mentioned above, in both stock and overclocked states. The system was left to undisturbed for 30mins after boot and the temperature then recorded for the idle reading. This was followed by a 30 minute Prime95 romp to take the loaded reading. Ambient throughout was 20° (+/- 0.5°).
Â
The next test conducted was a simulated load test. The cooler was set to work finding it’s equilibrium temperature when exposed to the heat generated by a certain amount of power. The cooler was tested at points of 50w, 100w, 150w and 200w to see how it would cope under various levels. Once again ambient was 20° (+/- 0.5°). The test was performed using a custom built load tester. This device uses two 200w cartridge heaters to warm up a small block of copper, allowing a flat surface for the heat sink being tested to be mounted on. The majority of the block is then insulated to minimise heat escaping via anything other than the side that the sink is mounted in. The heat dissipated by the twin cartridges is regulated via a variac, and the power between the variac and the cartridges is measured to ensure that the correct amount of power is being drawn. The temperature of the block is taken via a digital thermometer and k-type probe, from a small hole drilled into the copper between the two cartridges.
Â
The noise levels emitted from the cooler are extremely hard to asitane without some very expensive equipment, therefore you will have to rely on my fair ear for judgement in this department.Â