Published: May 21, 2008 |
Source:
CoolIT |
Author:
Llwyd Johnson
CoolIT Freezone Elite CPU Cooler
Installation
Â
One of the main aims of the Freezone Elite is to provide top performance cooling with as little hassle as possible. Being designed to be installed as easily as most of todays top-end air coolers and waterblocks, the Elite should not provide too much of a headache when setting it up.
Â
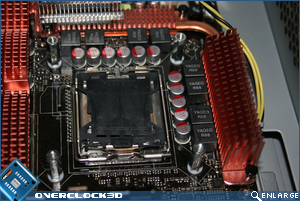
Following the moderately well illustrated installation guide, users will first have to install the motherboard standoffs and block mounting system. While in several parts, with some diagrammatic aid and a little common sense, installing this section is fairly easy, although it does require access to the back of the motherboard.
Â
Â
Â
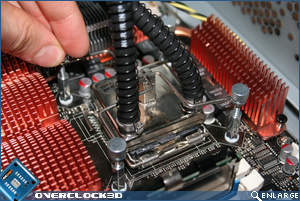
The next step is somewhat of a balancing act. The block now needs to be secured in the mounting system, which might seem simple but the short hose system means that the heavy cooler needs to be balanced nearby to allow for mounting as fitting the Elite will prevent access to the socket. In an average sized case you will just about be able to balance the cooler on the drive bays while you work. In a bigger case such as a V2010, this would not be an option. All I can suggest is trying to either balance it on the PSU or wrapping the cooler in some form of non-static producing padding and resting it on the motherboard while you fit the block.
Â
Â
The pressure in this mounting system is provided with two steel bars. While this system is simple and easy to install, I have to say I feel more pressure could be had with the use of a solid retention bracket.
Â
Once the block is in place, users can secure the cooler by the rear fan to the back of the case and set about the task of wiring up. This stage is a little complex due to the amount of wires one has to organise. Thankfully they are all colour coded (in a fashion) and labeled in the manual.
Â
Â
Test Setup
Â
For the testing of the Freezone Elite the following test setup was used:
Â
CPU: Intel C2D E4300
Motherboard: ASUS Rampage Formula X48
Â
The room temperature throughout testing remained at 12 degrees Celsius, all of the testing was done in a open, standard ATX case with a healthy airflow into the case . The room temperature was measured approximately 6 inches in front of the pull side of the fan. Usually when testing an air cooler, the temperature inside the case is registered and then any fluctuation in this temperature is factored into the results of the cooler. In this case, however, it is not know how much of a relationship there is between the air entering the Elite’s heatsink and the temperatures of the fluid heat exchanger. Therefore the temperature will be monitored closely and any noticeable links or large fluctuations will be best dealt with later.
For thermal interface paste, Arctic Silver 5 was used instead of the pre-applied paste. This thermal paste does require a burn in time and numerous cycles to reach maximum effectiveness but due to time constraints, this cannot be provided. Instead the paste will be left in use for three cycles of around 12 hours, with frequent periods of load and rest.
To test the unit, the coolant will be set to two target temperatures using the MTEC software. The first being 0oC. This will ensure the units fan and TEC banks are working at 100% throughout the testing and providing the maximum possible cooling. The second target temperature will be 15oC. This will test the coolers performance with settings more suitable for everyday use when considering noise.Â
Â
For each of the two target temperatures, the CPU will be run at stock speeds (200 x 9 @ 1.325v) and with an overclock (325 x 9 @ 1.505v) while idle and at load. In addition to this I will test the relation between the coolant temperature and CPU temperature. To do this I will find a range of temperatures within the cooler will be able to operate with load and then increase the target temperature in increments of two degrees, logging the CPU temperature increase
Temperatures were logged using both the MTEC software included and CoreTemp monitoring software.
For idle temperatures I left the PC for 30 mins then recorded the idle temperature every 10 seconds for 2 minutes, making sure I did not use any program that was not already running at windows startup.
For the load temperatures I ran an instance of prime 95 with in-place large FFT’s for maximum heat and power consumption, as well as an instance of [email protected] set to take up any spare cycles of the CPU. Once again I left this for 30 mins between any setting alterations and then recorded the temperatures over a 2 minute period.