


Hiper Osiris ATX Case

Interior
Â
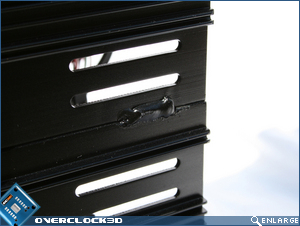
Hiper have thoughtfully included some catches on the side panels which allow a tool-less entry to the internals of the case. The catches themselves are once more metal and although a little stiff to work at first, soon loosen up with a few uses. They are also robust enough that they should last some time and won’t become tatty through over use. Two of these catches are on both panels and slide downwards releasing the door panels. While in the ‘locked’ position there is no fear of the panel coming away any more than if they were screwed to the case.
Â
Â
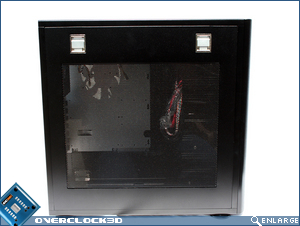
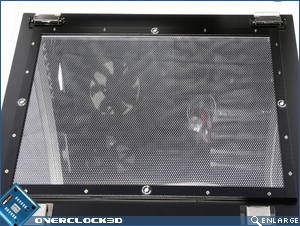
With the side panel off you can better see the mesh/perspex window. This is one of the best ideas I have seen in case design for a long time and probably my favourite aspect of this case. On the outside, the mesh serves three fold. Firstly it will protect from those inevitable finger prints and secondly as there will be no finger prints, there won’t be any scratches and swirl marks that usually become apparent after a few wipes of the perspex removing said fingerprints and dust but perhaps most importantly the mesh also serves to prevent EMI. The mesh is fine enough to allow light to pass through the case and acts like a tinted window from a distance which looks quite cool. Once more the finish is perfect with no ill fitting apparent. If you want even more ventilation then the perspex can be removed to leave just the mesh via tiny screws on the inside of the panel.
Â
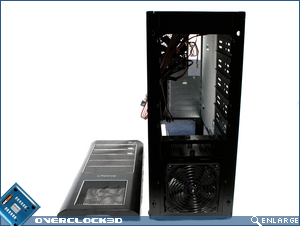
The front panel is easily removed by simply pulling at it from the hole in the bottom. It is affixed via push/pin style clips that while relatively easy to remove are solid enough to hold the front panel in place.
Â
Â
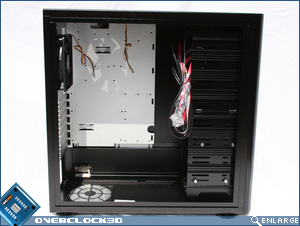
I was pleasantly surprised to see that the inside of the case is also black with the motherboard panel being silver. The paintwork once more is pristine with no blemishes that I could find. The pristine paintwork is however spoilt by a Hiper bar code type sticker and while it should be easy enough to remove it is one of those minor irritations that shouldn’t be there.
Â
The motherboard panel allows fitment of most form factors and the provided motherboard stand-offs screwed in easily and matched up to the motherboard holes precisely as you would expect. Sadly, the motherboard panel is not removable which is a real disappointment as this is a feature I am coming to depend on as I now change boards as often as graphics cards! I appreciate this is a sub £100 case but it cannot be that difficult to incorporate and would make this case so much easier to work with internally as I shall explain later in the review.
Â
The drive bays are welded in place and are adorned with ‘fins’ that make the drive bay area look like some sort of huge heat sink. I am unsure if that was the purpose of the fins or if it is purely cosmetic but once again this also presented some fitting difficulties.
Â
Â
Upon closer inspection of the case there are a few visible welds that while not exactly unsightly the do spoil the ‘precision’ feel of the case. I guess this is a price you are going to have to pay as the Hiper case is of a screw less design (in part) and as its a one piece frame it should stand the test of time and not develop those little squeaks and rattles after a year or so of use. I understand that alloy is notoriously hard to weld but it’s the little details that can help the overall impression of the case and this is hopefully something Hiper will improve upon in the future.Â