Published: December 7, 2008 |
Source:
ASUS |
Author:
Rich Weatherstone
Asus P6T Deluxe X58 OC Palm Edition Motherboard
BIOS
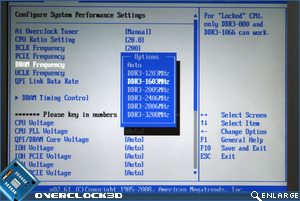
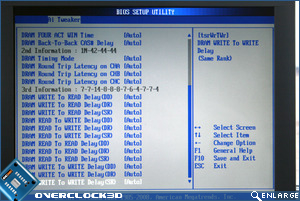
Skipping past the usual plethora of BIOS options we had straight for the business end of the BIOS, the AI Tweaker section. Those used to Skt775 will notice an option that is no longer present on the P6T Deluxe and that’s the FSB (Front Side Bus) feature. That’s because this has, in its most basic form, been replaced by what Asus calls Base Clock. Using a large multiplier and small clock may seem like suicide for performance freaks looking to squeeze every last drop of performance out of their rigs but there is a method to Intel’s madness as this doesn’t seem to have affected the performance as we shall see in the benchmarking section of the review.
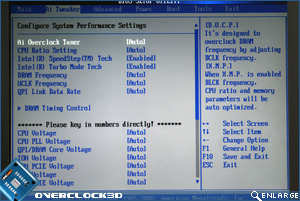
Notice when the CPU ratio (maximum of 20 on the i7 920) is changed from AUTO to 20, the Speedstep and more importantly, the ‘Turbo Mode Tech’ options disappear? The Turbomode Tech works by altering the CPU multiplier past its maximum setting of 20 up to 21 when the CPU is put under load, working to the opposite of Speedstep. So in effect when the CPU is under load, the CPU is overclocked by the multi which is great news for those who don’t wish to overclock the BCLK (Base Clock) frequency but still desire that extra boost when it is needed most.
Â
Â
Â
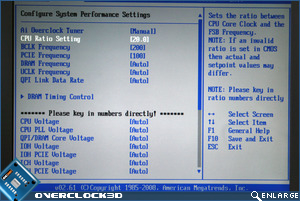
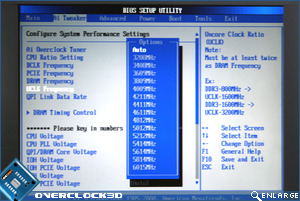
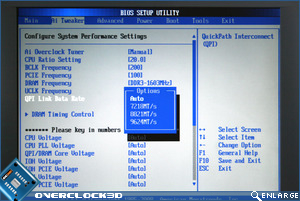
Remember how IÂ said that the FSB is no more? Well that’s not all, the chipset strap has also died a death and has been replaced by settings unfamiliar to those who have become accustomed to skt775 settings. The UCLK Frequency option controls the speed of the Uncore clock, which in turn controls the bandwidth for the link between the on die memory controller and therefore the DDR3 modules themselves. This link speed is dependent of the DRAM memory dividers (frequency) as shown above. The QPI (Quick Path Interconnect) Link Data are similar in operation to Hyper transport bus found on previous Intel motherboards and are directly linked to the input of the Bclk (Base Clock) setting. Got that, OK let’s move on.
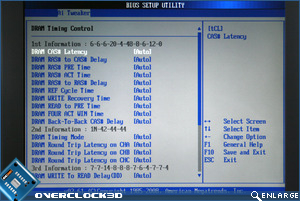
Memory Timings are still here thank goodness and the Asus P6T Deluxe has these settings in abundance with every timing you could possibly wish for. For simplicity, only the basic settings were adjusted for this review with the ram modules set at their stock ratings of 8-8-8-24.
Â
Â
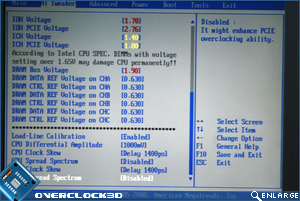
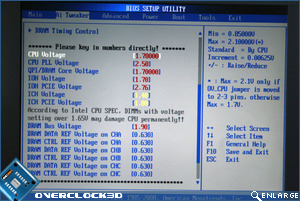
Above left we see the remainder of the DRAM timings and above right is the scary part of the BIOS. Here you can see the maximum available voltages which anyone would be crazy to use on their shiny new i7 CPU’s (no I didn’t actually set these!). The Vcore can also be pushed even higher (2.1v!) should you feel the need but this can only be done by switching the on board CPU Over voltage jumper. There are plenty of GTL reference voltages to play around with too once you have found you maximum overclock which may help to help stabilise the overclocked settings. Also in-situ is the Loadline Calibration tool which on testing worked very well with Vdroop suffering only ever so slightly (0.02v).
Â
Â
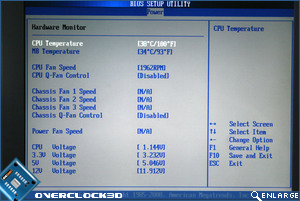
Rounding off the BIOS section, we come to the Hardware monitoring section. While this section is useful on most motherboards, I somehow felt it was made redundant by the OCÂ Palm monitoring software, not that either should be trusted 100% anyway and should only really be used as a guide.
So then, a very complete if somewhat different BIOS to what Core2 users will be familiar with. Rest assured though, it is pretty easy to pick up once you get your head around the new settings. It always helps when you have such a well laid out BIOS such as the one Asus have provided with the P6T Deluxe.
Let’s take a look at how the board actually performs with a few tweaks of the new settings available..