


ASUS Rampage II Extreme X58 Motherboard Preview

The Board
Â
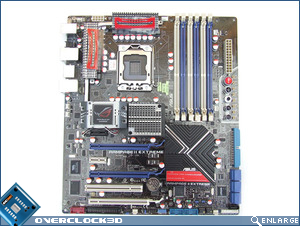
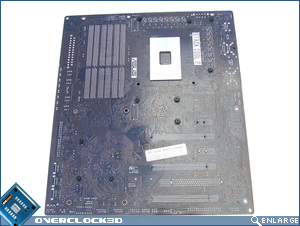
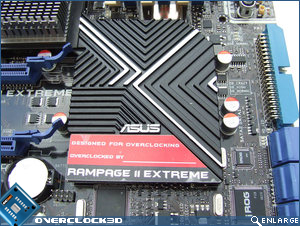
The ASUS Rampage IIÂ Extreme, unlike the ASUS P6T Deluxe motherboard that we previewed earlier, comes in an EATX format. This has been done purely to ensure that everything can fit on the motherboard PCB without being too crowded. Looking at the image (below left) we can see why. In similar fashion to the Rampage Extreme, the Rampage II Extreme features a number of heatsinks to cool down critical components, and these are attached to the motherboard via spring-loaded screws. This ensures a better contact with those components (chipset, MOSFET etc) and ensures that the weight of these heatsinks doesn’t become an issue. The CPU socket is riveted onto the PCB courtesy of the Aluminium backplate.
Â
Â
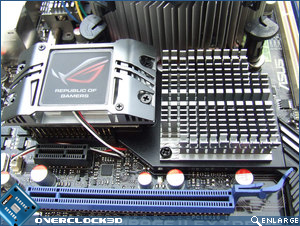
Beginning our tour of the ASUS Rampage II Extreme motherboard, we can see the inclusion of the heatsinks immediately below the CPU socket. The heatsink with the ROG logo on provides cooling to the 3-Phase power circuit underneath it that feeds power to QPI/DRAM and the NB.
Â
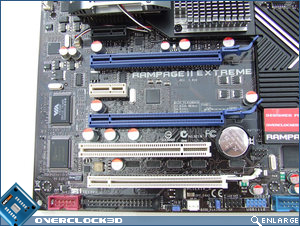
In the lower left-hand corner of the motherboard, we can see the black PCIE 1x slot for the SupremeFX daughter-board, and below that, three PCIe 16x slots for multiple graphics card setups. According to ASUS documentation, when running two graphics cards (blue slots) they will both provide x16 bandwidth, but when running Tri-SLI or three cards in CrossfireX mode the top slot provides 16x bandwidth and the remaining two provide 8x. Additionally, there is one remaining PCIe 1x and PCI slot, but if running a multiple GPU setup these will be lost.
Â
Â
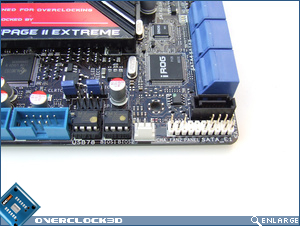
Along the bottom edge of the Rampage II Extreme we have 1x IEEE1394; 1x floppy drive; 3x SATA (including extra 1394 module) ports and the front panel connectors. You’ll also notice that the Rampage II Extreme has a dual BIOS setup and the jumper pins for selecting which BIOS you are going to boot from is immediately above the BIOS chips themselves. We can also see the inclusion of the iROG microcontroller behind the SATA ports which controls onboard temperatures, onboard LED’s, Stepless voltage adjustment and BIOS Flashback.
Â
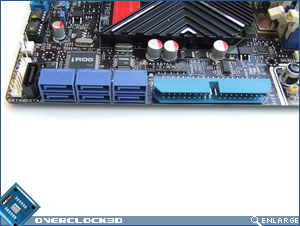
Moving up the right hand side of the Rampage II Extreme we have seven SATA ports, one of which (black one) is controlled by an additional controller. Next to the SATA ports we have the obligatory IDE port.Â
Â
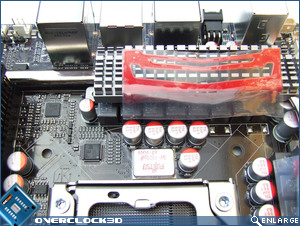
There are six memory DIMM slots, which as we know will be need to be able to run at 1.65v or lower to prevent damaging your precious Core i7. These are nicely presented in the now familiar ROG blue and white theme, instead of the orange and black of the Ai Lifestyle motherboards. Under the large black heatsink there are 3-phase power ML capacitors for the memory DIMM’s, as well as the SB chipset. The ASUS Rampage II Extreme also provides DDR3-1800(OC) memory support. The additional real estate of the Rampage II Extreme also means that there is plenty of room between the topmost graphics card and the memory DIMM slots. This means that there won’t be any fouling of the DIMM clips against the graphics card, which unfortunately plagues motherboards that utilise the ATX format.
Â

Â
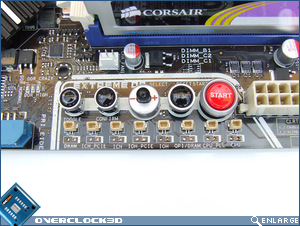
Situated next to the memory slots is an area that should draw the attention of many overclocking enthusiasts. In similar style to the X48-based Rampage Extreme, its younger sibling receives the same TweakIt buttons that allow voltage tweaking on-the-fly in Windows. Immediately below the TweakIt buttons are the eight voltage detection points that the ‘ProbeIt’ patch cables can be used with to measure voltages. Measurable voltages are: DRAM; ICH_PCIE; ICH; IOH_PCIE; IOH; QPI/DRAM; CPU_PLL, and CPU vCore.
Â

Â
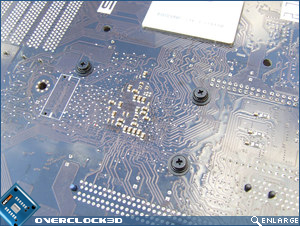
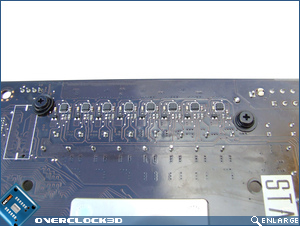
The CPU socket area is reasonably clean; however, those who prefer more extreme cooling methods may have issues when it comes to preparing the socket area against condensation. In ASUS’ defense, the socket area has been decked out with low-profile solid capacitors, so they shouldn’t be too much cause for concern. Once again, the only way around this would have been to go with digital PWM like DFI, but this would add significantly to the cost of the motherboard. Additionally, there are 16 Ferrite chokes situated around the CPU socket in an 8 + 8 configuration.
Â
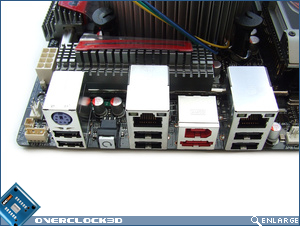
The rear I/O panel features more than enough connectivity options with: 6x USB 2.0; 2x ethernet; 1x PS2 keyboard; 1x IEEE Firewire and 1x e-SATA ports. ASUS has also included the now standard CLR_CMOS button which makes things easier if you’re pushing your hardware to the limit.
Â
Now that we’ve managed to have a look at the ASUS Rampage II Extreme’s packaging, bundle and the board itself, let’s head over the page to see what conclusion we can draw about the motherboard…