


Zotac GTX285 Infinity Edition PCIe Graphics Card

Packaging & Appearance
Â
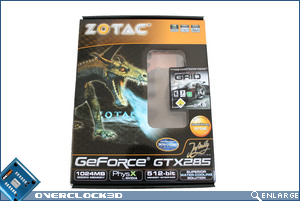
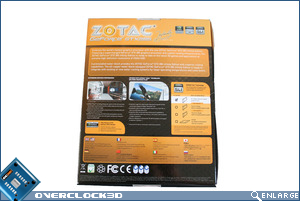
The exterior of the package is well presented with all the usual product features featured such as PhysX capability, 1024MB GDDR3, Cuda, PureVideo and SLI displayed in emblem format. There’s also an Infinity ‘signature’ printed as part of the box which is nice to see rather than a sticker which seems to me to be something of an after thought by other manufacturers. The two stickers that are welcome on the box are RaceDriver GRID and 3DMark Vantage signifying the freebies that are included with the Zotac GTX285 Infinity. Good choice! The rear of the box goes on to describe the features of the GTX285 more in-depth with PhysX and CUDA taking pride of place.Â
Â
Â
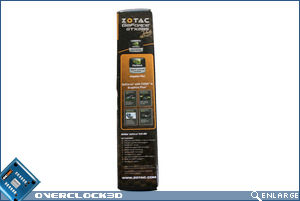
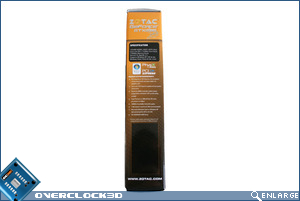
Yet more features are displayed on the left panel of the box with Nvidia ‘Graphics Plus’ being the theme. Video processing up to 20x faster, Image processing with ‘silky smooth performance’, 3D Stereo and again PhysX are just some of the features the card has to offer. The alternate side displays the specification and minimum system requirements. The minimum being a 550w PSU with a 12v current rating of 40A required along with 2x 6-pin PCIe power connectors needed. This isn’t exactly true as Zotac include a Molex to 6 pin power adapter should your PSU be found lacking in this department.
Â
Â
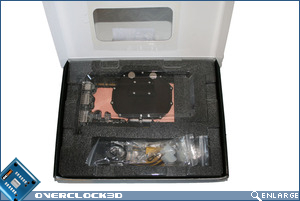
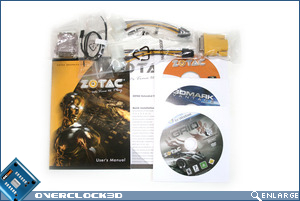
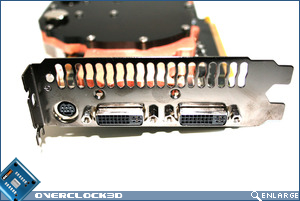
Opening the box, we see that the graphics card is very well displayed with a plastic window covering the whole unit for both protection and aesthetics. The card is solidly packed in Styrofoam to prevent unwanted movement with a separate compartment for the accessories. Speaking of accessories, the Zotac GTX285 Infinity has all the essentials you need to get going with a DVI-VGA adapter, DVI-HDMI adapter, 2 Molex – 6-Pin adapters and an S/PDIF pass through cable allowing the on-board audio to be used in collaboration with the HDMI feature.
Â
Â
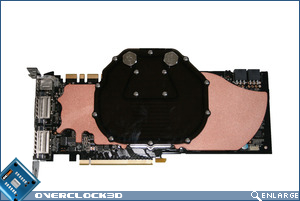
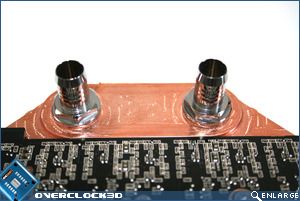
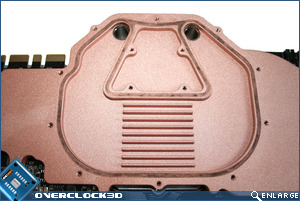
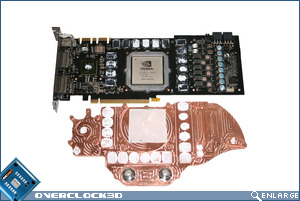
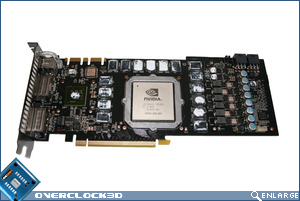
The card itself is a standard GTX285 (with a tweaked BIOS). What is plainly obvious though is that this card is no ordinary GTX285. The waterblock sat in place of the standard air cooler is a joy to behold and while IÂ wouldn’t go so far to say it was a masterpiece in design, it certainly looks the part, especially with the backdrop of a black PCB. Both the top and bottom of the block allow different configurations of the included 3/8″ G14 threaded barbs to be used so that SLI can be added to you system without the barbs getting in the way.
Â
Â
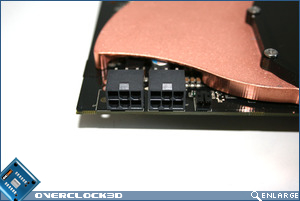
The barbs themselves appear to be very similar to the standard Hi-Flow barb but only 3/8″ barbs are included in this package so you may wish to purchase additional barbs should this size not be to your liking. Care should also be taken when choosing additional barbs to ensure that they are short threaded as a standard barb will not fit flush with the block due to the thread length. The copper section of the card is elegantly swooped around all the major components of the card not requiring cooling with additional cutouts for those section which stand proud such as the PCIe power ports of which there are 2x 6 pin.
Â
Â
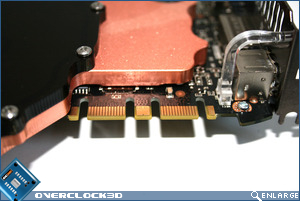
The card is obviously SLIÂ enabled and as mentioned previously the top and bottom of the waterblock is threaded to allow configuration of the barbs to best suit your setup which is ideal for those intending to SLI, or indeed TRI-SLI three of these cards together. Sadly the backplate is not a single slot design which is a shame as the dual slot backplate may prove a hindrance to those wanting to use that I/O area for an additional expansion card.
Â
Â
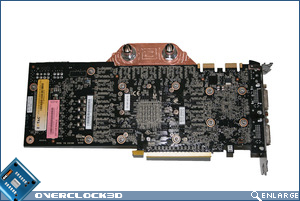
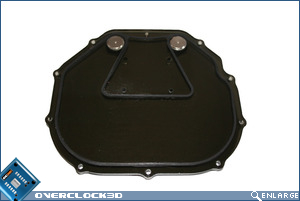
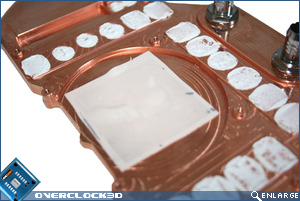
Removing the acrylic top of the block was a painless affair but as with any acrylic top, extra care should be taken when re-attaching the block because of the nature of acrylic cracking under pressure. The top is thick enough to prevent all but the most clumsy of builders but accidents do happen. The rubber seal fits snuggly in a channel surrounding the block and in testing, no leaks were apparent. The block itself is a full length copper affair with Danger Dens trademark dimpled/rough effect on the copper. I’m not a big fan of this effect as it makes cleaning the block so much more difficult. Luckily for me the card arrived in pristine condition but I can imaging after use, oxidizing fingerprints will materialize which look unsightly at best.
Â
Â
The block is held in place by 11 screws, each having a rubber grommet to prevent shorting. The card was not bowed in anyway which is unusual for a full cover block and a welcome sight. Removing the block was very easy thanks to the use of paste and thermal pads which didn’t prove to be too adhesive to the card.
Â
Â
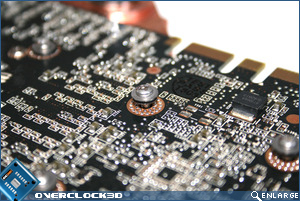
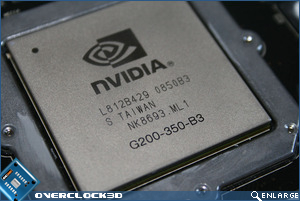
Taking a closer look at the card you will notice that the main section cooling the GPU is in fact, a thermal pad. This is opposite to what we are used to seeing with thermal pads usually being used on the memory and VRM’s and paste on the GPU. It only remains to be seen if this pad hinders or helps temperatures. The contact on all components was very good, especially considering paste was being used as opposed to pads. However, the machining finish on the GPU was less than desirable with lots of score marks left over from the process which may prove to hinder the performance of the block during heat transfer.
Â
Â
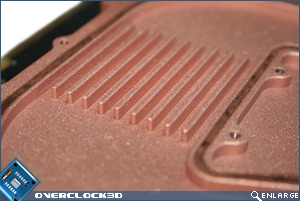
Directly above the GPU are a number of channels inside the block that while crude and dated in design will increase the surface area of that section ensuring the best possible heat transfer is in that particular area. You wouldn’t dream of putting a CPU block like that in your loop but it seems GPU block manufacturers do not put as much thought into cooling a GPU which is a shame when you consider the benefits that could be had. Nevertheless, the block is a very good looking block, well manufactured and as it is a full copper block it will not deteriorate though galvanic corrosion assuming your waterloop consists of the same material.
Â
Â
So then a very nice looking and no doubt powerful card indeed with some great accessories. I do however, have concerns over the basic design of the block and the method of heat transfer from GPU to water but on some occasions simplicity is best and looking at the block, restriction should not be an issue so there isn’t any worries there. The cooling performance however, remains to be seen.
Â
Let’s take a look at the setup IÂ will be using today and put the card through it’s paces in the overclocking section…Â