Anidees AI Crystal Tempered Glass Case Review

Up Close: Interior Rear of Motherboard
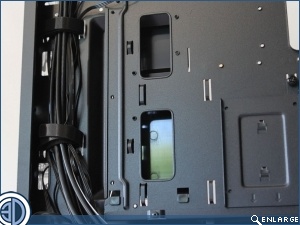
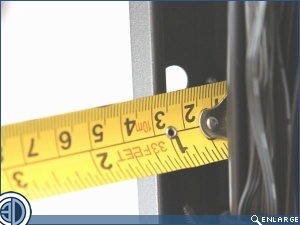
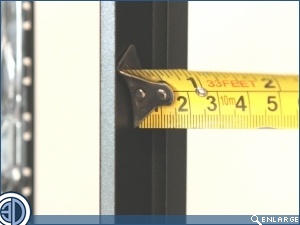
It might not look like it, but there’s actually a hell of a lot going on back here. For starters, we can see that we do in fact have cable management holes, three along the top, and two vertically down the side. They’re not grommeted, but the major ones do have that cover to hide the cables as they emerge. We’ve also got a fan power distribution hub which is linked to the three speed fan controller on the front of the case. We especially like that two of the outputs have been left open, should you wish to add extra fans.
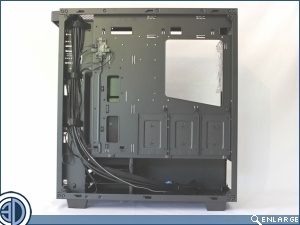

Cable management space is a bit of a mixed bag. In the main channel down the left hand side of the case (towards the front) there’s absolutely oodles of space on offer. The rest of the case however is a little bit of a concern as it appears that there’s only 10-12mm of space in which to wrangle those cables about. There are though positively 1000s of cable tie points on offer so all is not lost. Still, if you’re going to be buying this case, which if you remember has a glass panel to the rear of motherboard area, then you’re probably the sort of chap who takes pride in his cable management, in which case, the slim profile won’t be a problem, and the oodles of cable tie points will be very much appreciated. If however you’re the sort of person who just stuffs the cables round the back into a big lump and screws the back on, we think it’s best you stop reading this review now, this case is not for you. No seriously, STOP
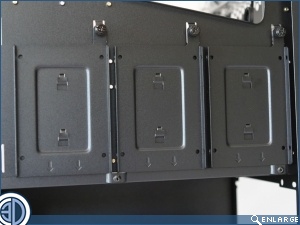
If you’ve made it this far, and you’re wondering where all the storage is at, then wonder no more, it’s round t’back. Should you need them there are a total of 3 quick release mounts for 2.5″ drives, and a couple of drawer type racks for 3.5″ drives. Anidees actually quote storage for 3×3.5″ but we’re buggered if we can see where the 3rd goes. And remember if you’re mounting 2.5″ drives back here to use flat SATA connections and flat individual SATA power cables, because there isn’t room for anything else.

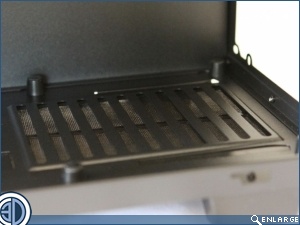
The image below left shows the main cable routing track and the management holes with the reverse of the cover plate in place. These management holes can actually accessed from the left through the main cable track, which is, we think the way that we’re likely to do it. Below right we see the PSU mount area. the whole area is covered, so be careful to position that PSU the right way up on the four rubber topped mounts.