


Antec P183 Advanced Super Mid Tower

Installation
Â
 To really test the Antec P183, I decided it needed to be tested with a CPU setup which I knew generated alot of heat, so in went the Intel Core i7 gaming setup which comprises of the following:-
Â
• Intel Core i7 920
• Asus P6T OC Deluxe Palm
• 6GB of Corsair Dominator Ram
• BFG 295GTX
• 1 x Western Digital RE3 250GB SATA HDD
• 1 x Samsung Sata DVD R/W drive
• BeQuiet 1200w PSU
• Nexus XiR-3500 CPU cooler
Â
This should give us a good idea on how easy the case is to work with and how well it copes with high end components
Â
Â
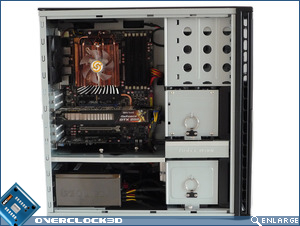
 The build process itself was pretty straight forward as Antec have kindly pre-installed the main ATX system board standoffs and supply additional spares if needed. I was disappointed to find
the motherboard tray is permanently fixed in place; it would have been nice if this was removable but it didn’t really hinder the build process in any way. Before starting your build, it’s a good idea to remove the upper and lower drive cages as this frees up alot of space in which to work within the case, allowing you to install your motherboard and route cables without any issues. After installing the motherboard I moved onto fitting the PSU. Without the lower chamber middle fan in the way, this went in without a hitch (the BeQuiet 1200w PSU is a big beast) and cables were routed via the back of the motherboard tray. I have to mention, I had no issues with the PSU cables not being able to reach their respective homes on the motherboard. However I did have some problems with the cabling in the lower chamber itself, purely due to the size of the PSU the cables encroached into the lower hdd chamber, but this was 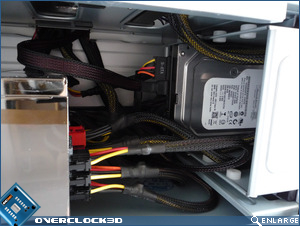 manageable and far better than the P183’s siblings.
manageable and far better than the P183’s siblings.Â
Next to be installed was the hard drive. This simply screwed into the primary hard drive cage and was cushioned by rubber grommets. These help eliminate any vibrations and keeps the noise of your drives to a minimum.
Â
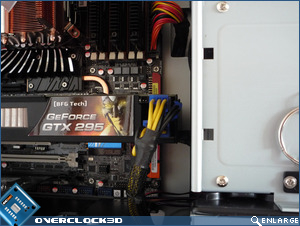
If you are looking for a toolless case, the P183 is not for you. This has never been an issue for me, as most toolless cases I have looked at have had poor implementations in place for securing your add in cards and hard drives, so no great loss there. Moving on to installing the graphics card, space is at a bit of a premium, as I had to remove the drive rails from the middle chamber so that I could fit in my 295gtx. You can of course remove this upper cage totally, but that would mean sacrificing the drive bays. Also, with the cage present it acts as a duct for cool air coming into the case straight onto your graphics card.Â
Â
Lets move onto the testing and results.Â