ASUS PRIME AP303 PC case Review

Up Close with the ASUS PRIME AP303

Up close with the ASUS PRIME AP303
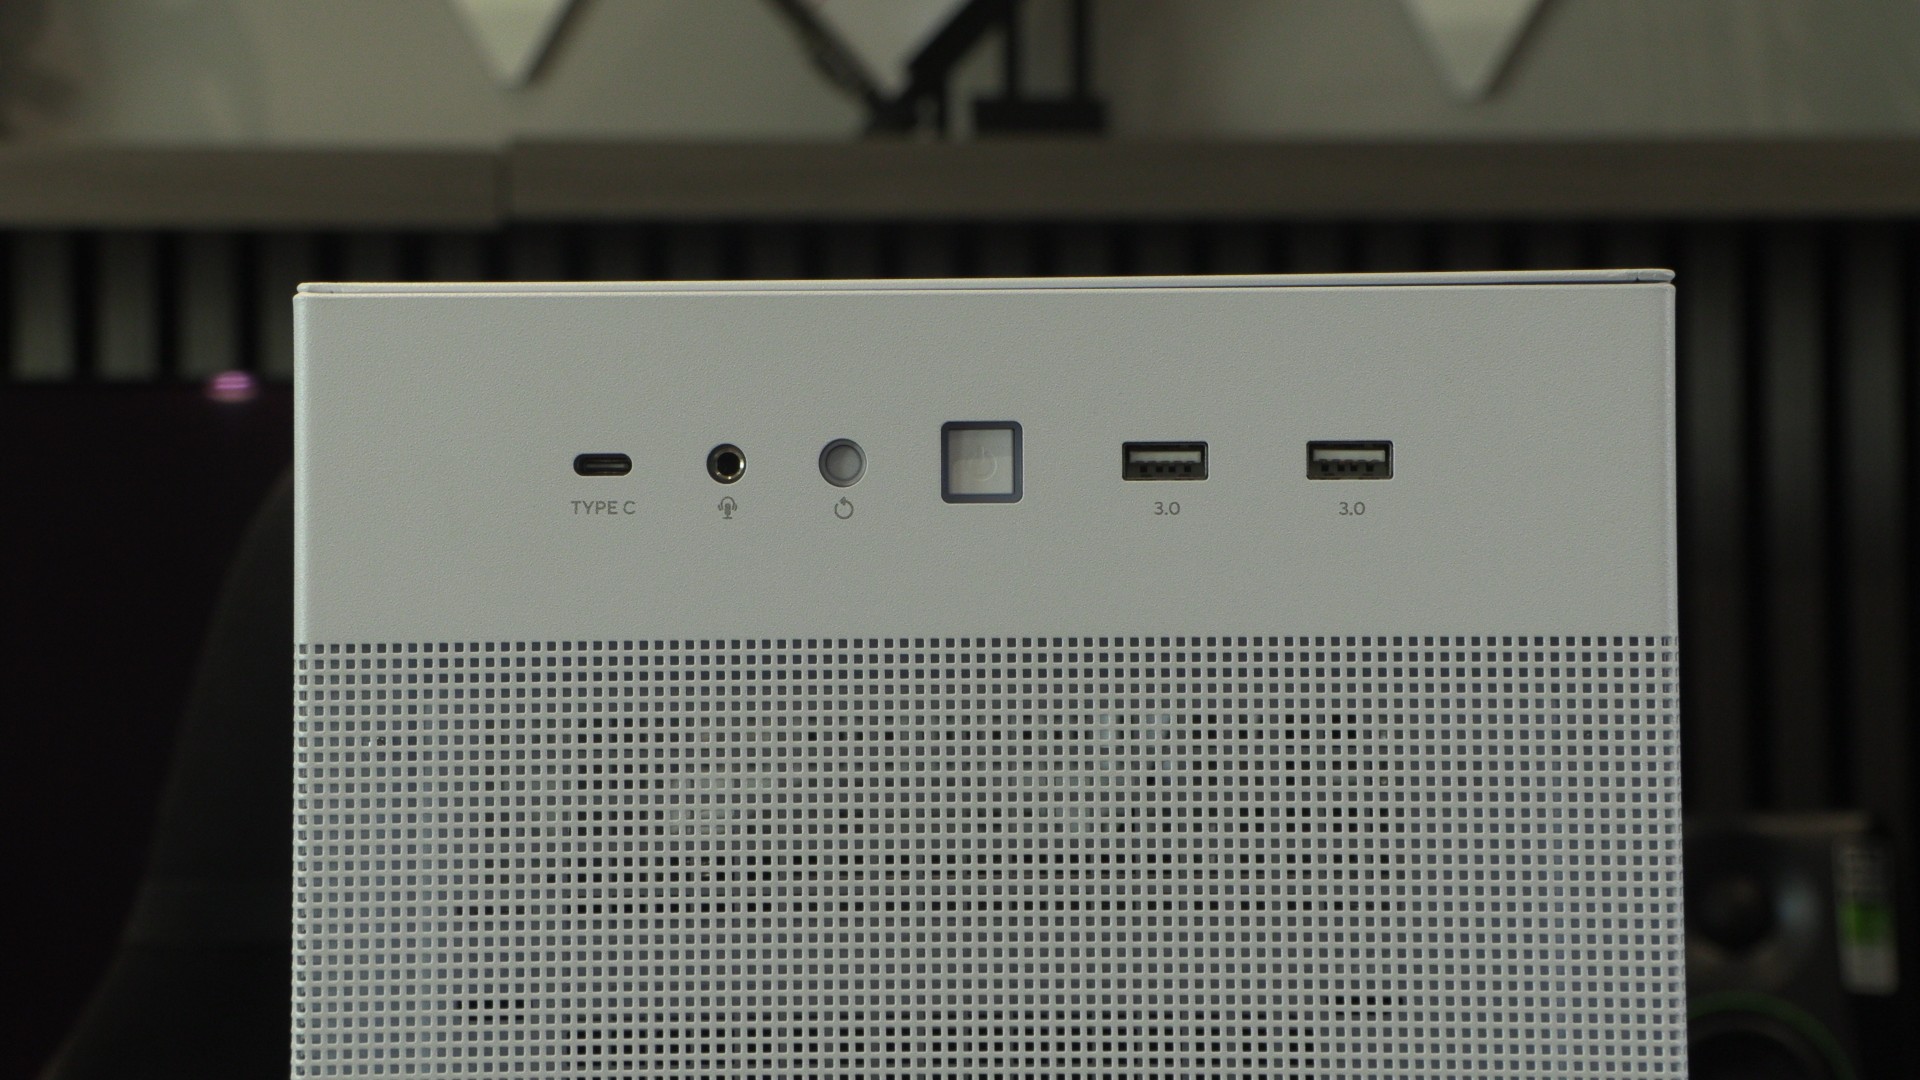
As usual, we will start with the front IO. We have standard power/reset switches alongside two USB Type-A ports, one USB Type-C port, and a 3.5mm audio in/out port. Note that this USB Type-C port is USB 3.2 Gen 2×2, which provides 20 Gbps of potential bandwidth. That’s a fast port. Most PC cases settle for USB 3.2 Gen 2 for its front Type-C port, but not ASUS.
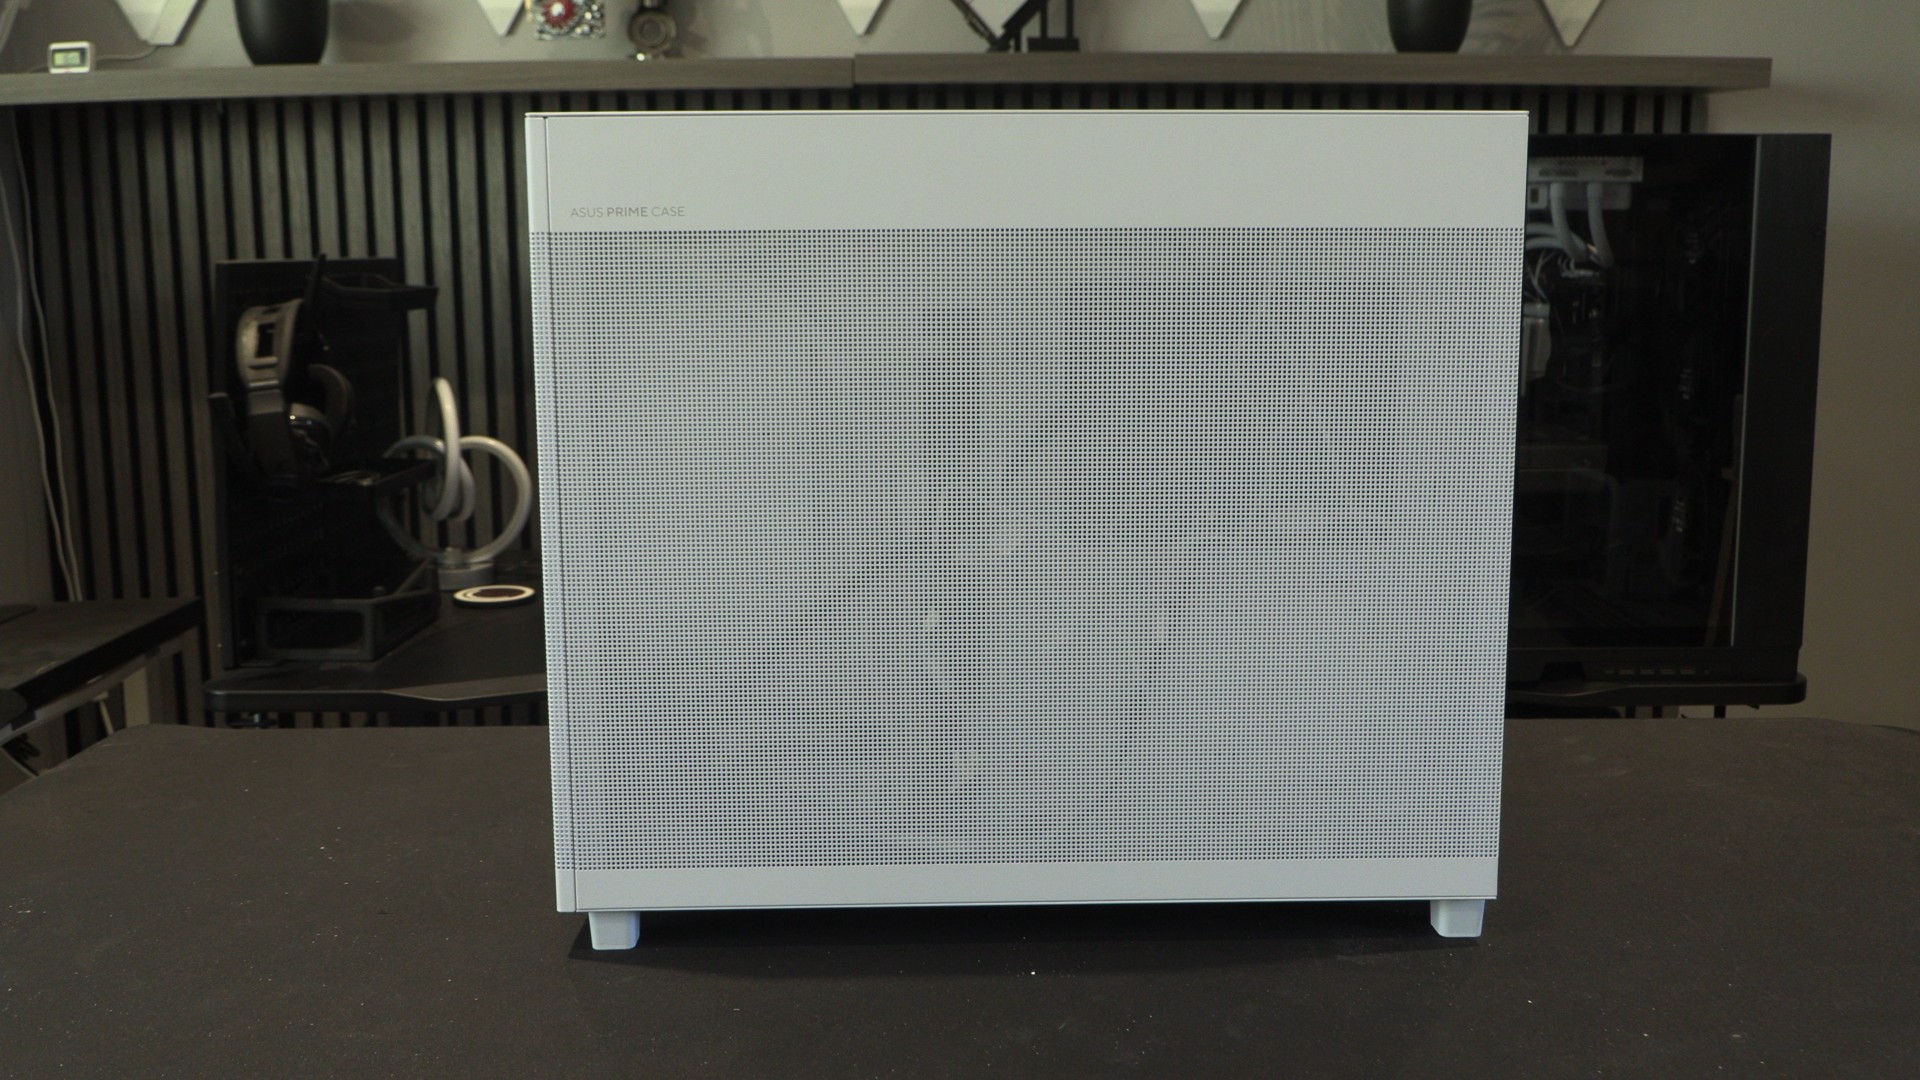
Not a standard front
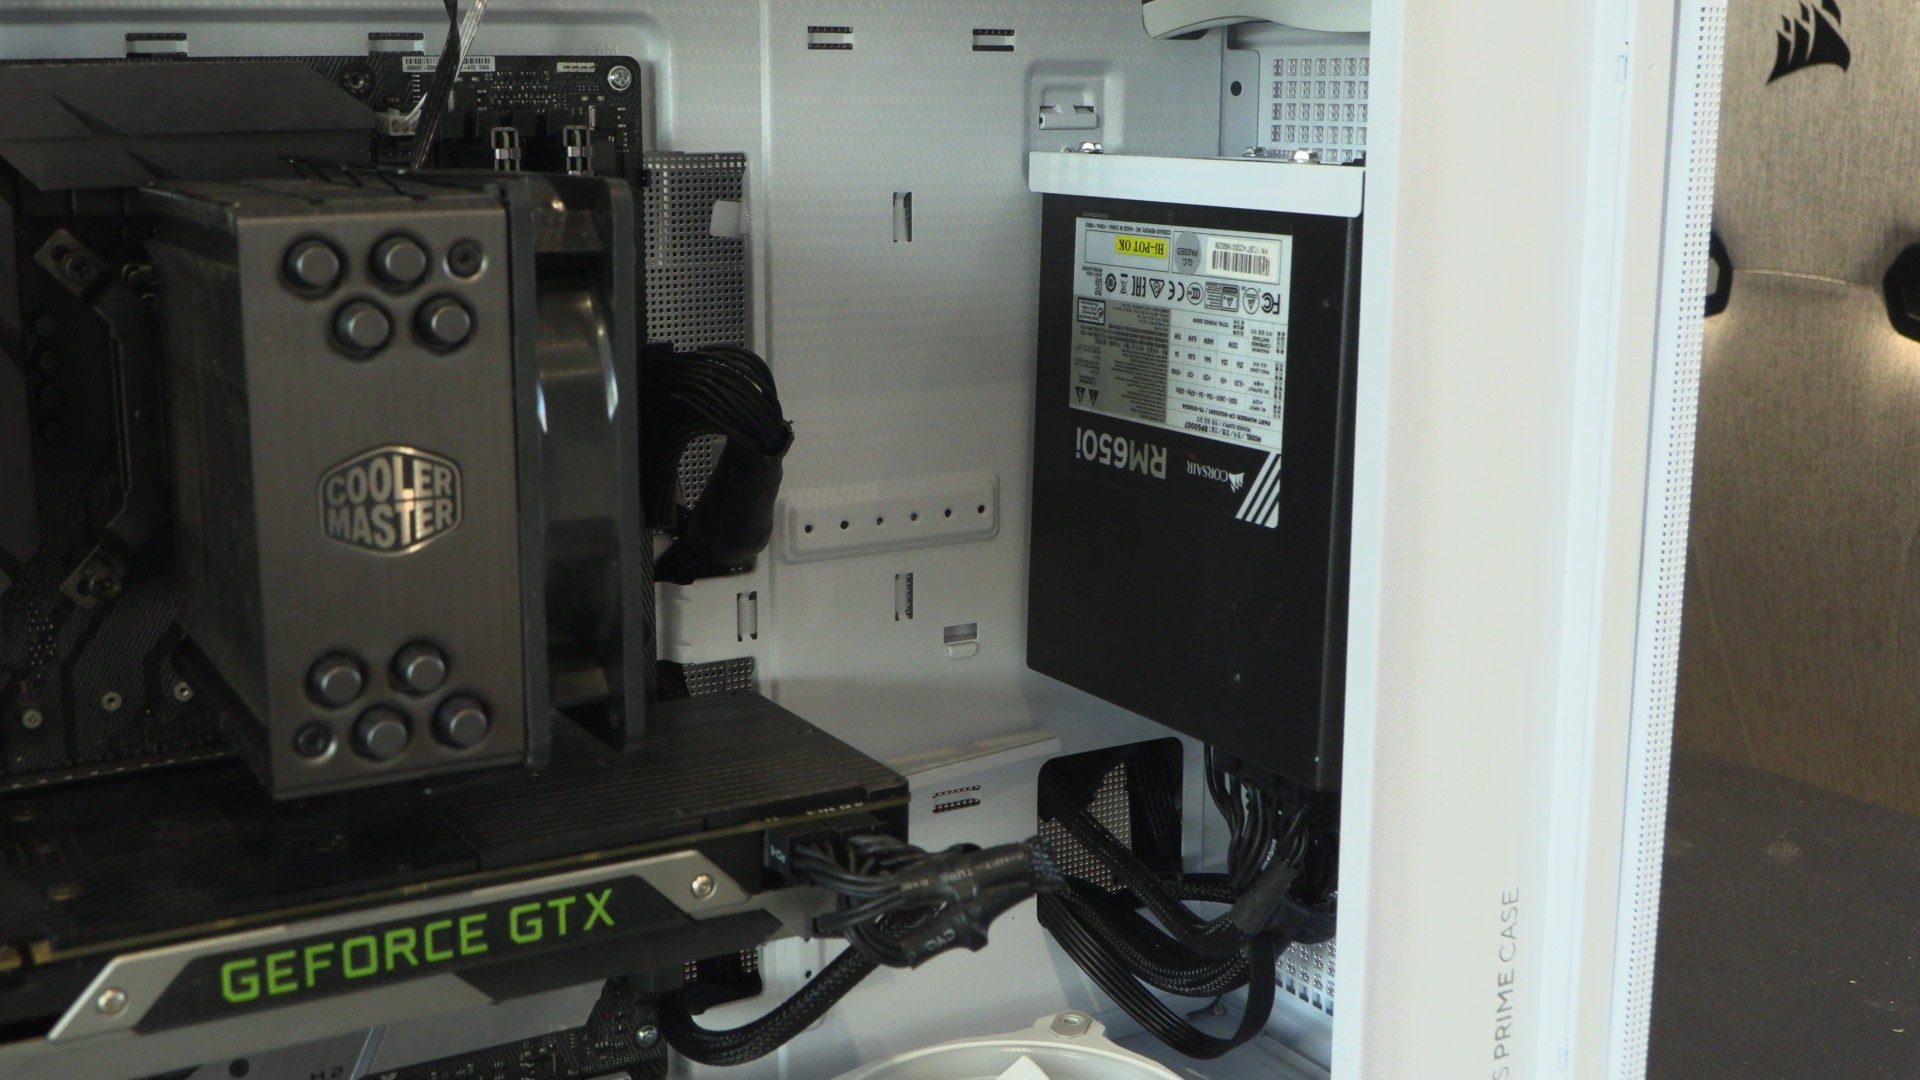
While the front of the AP303 is meshed, this is not its primary air intake. Behind this grill is where users will install their power supply. That means that your PSU will use this area as an air intake. ASUS intends for users of this case to intake air from the bottom and expel it from the top—a classic “chimney-style” cooling design.
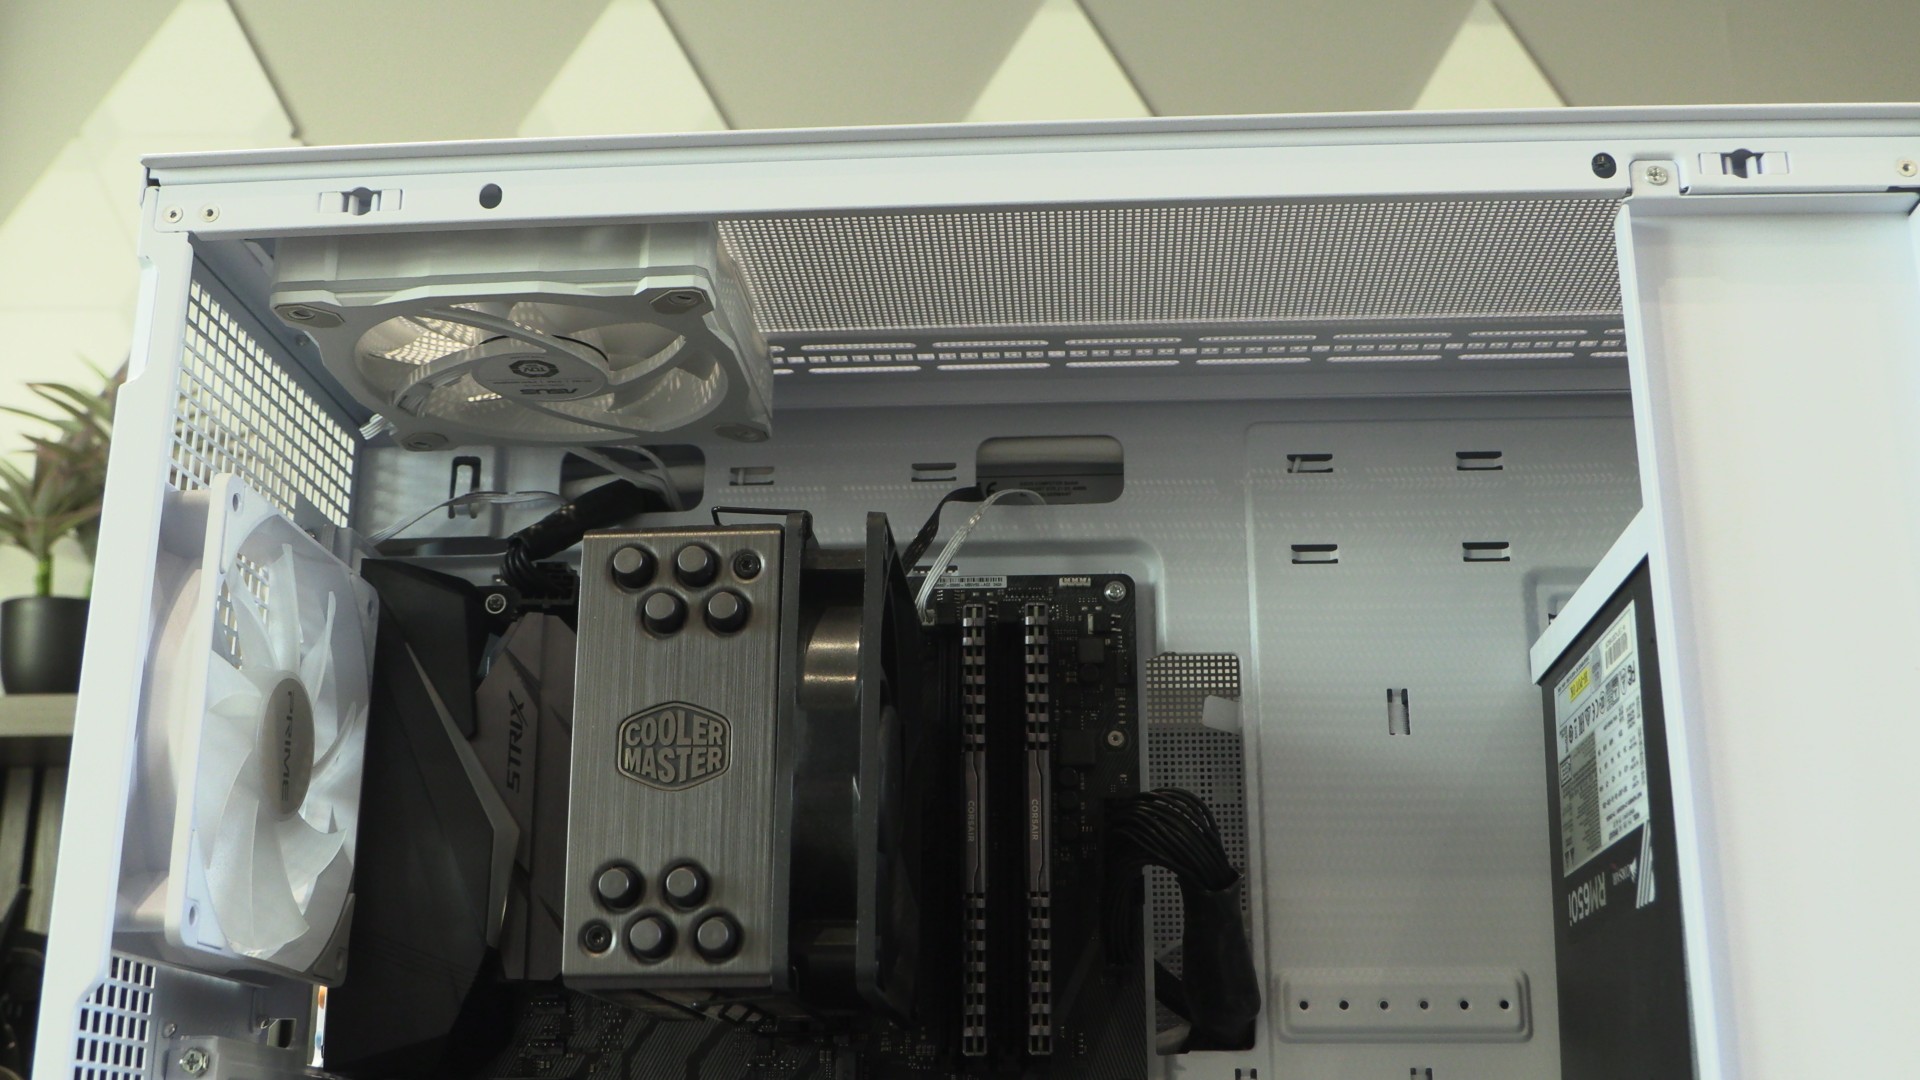
What we have here is an unusual case layout. That said, aside from its PSU placement and primary air intake, this is pretty much a standard ATX case layout. This case has space for three 120mm intake fans at the base and up to three 120mm fans at the top for exhaust.
PSU placement
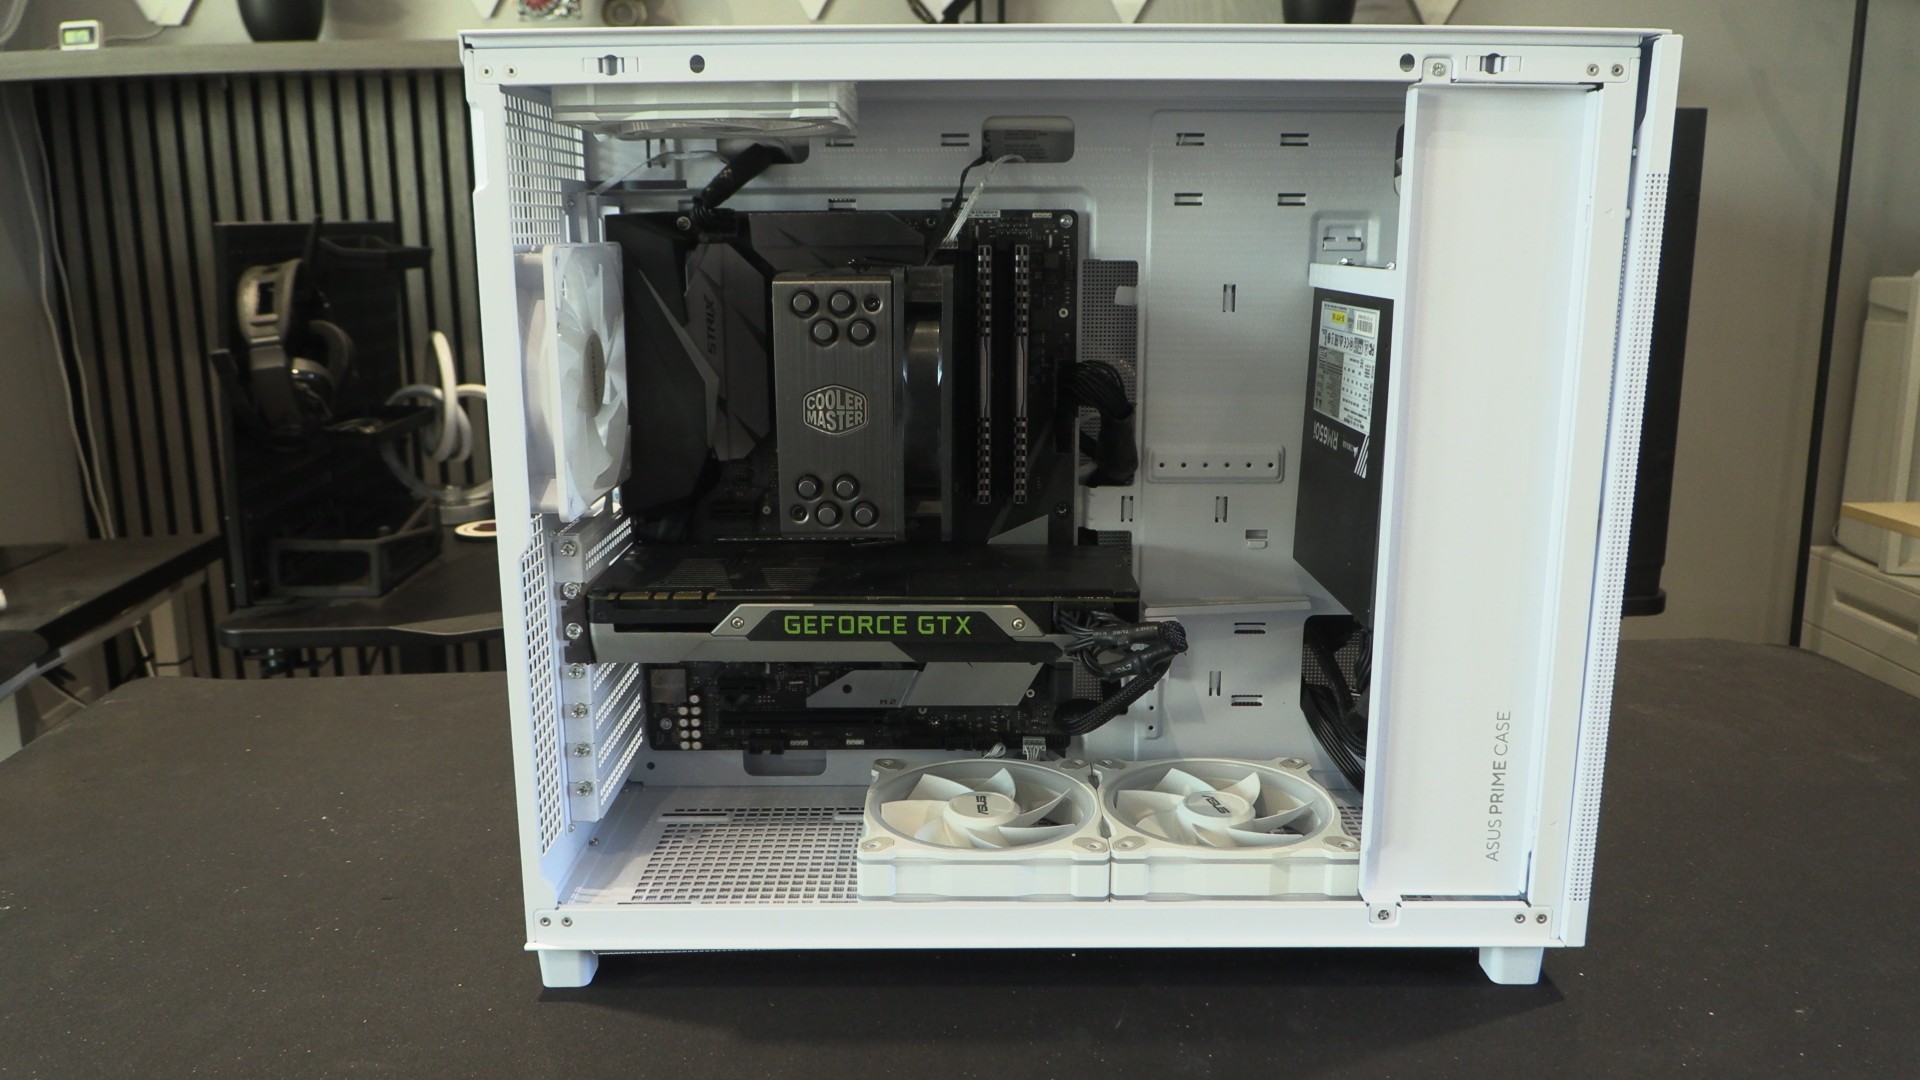
Users can install PSUs up to 180mm long at the front of the AP303. Cables are routed behind the motherboard tray, just like a standard PC case. The PSU is fully visible if you view the case from this angle. Some modders may want to use some plasticard to cover this area. That simple mod would greatly clean up this area of the case.
For our testing, we have installed three 120mm fans inside this case. Two at the bottom and one at the top. Note that these are reverse-bladed fans.
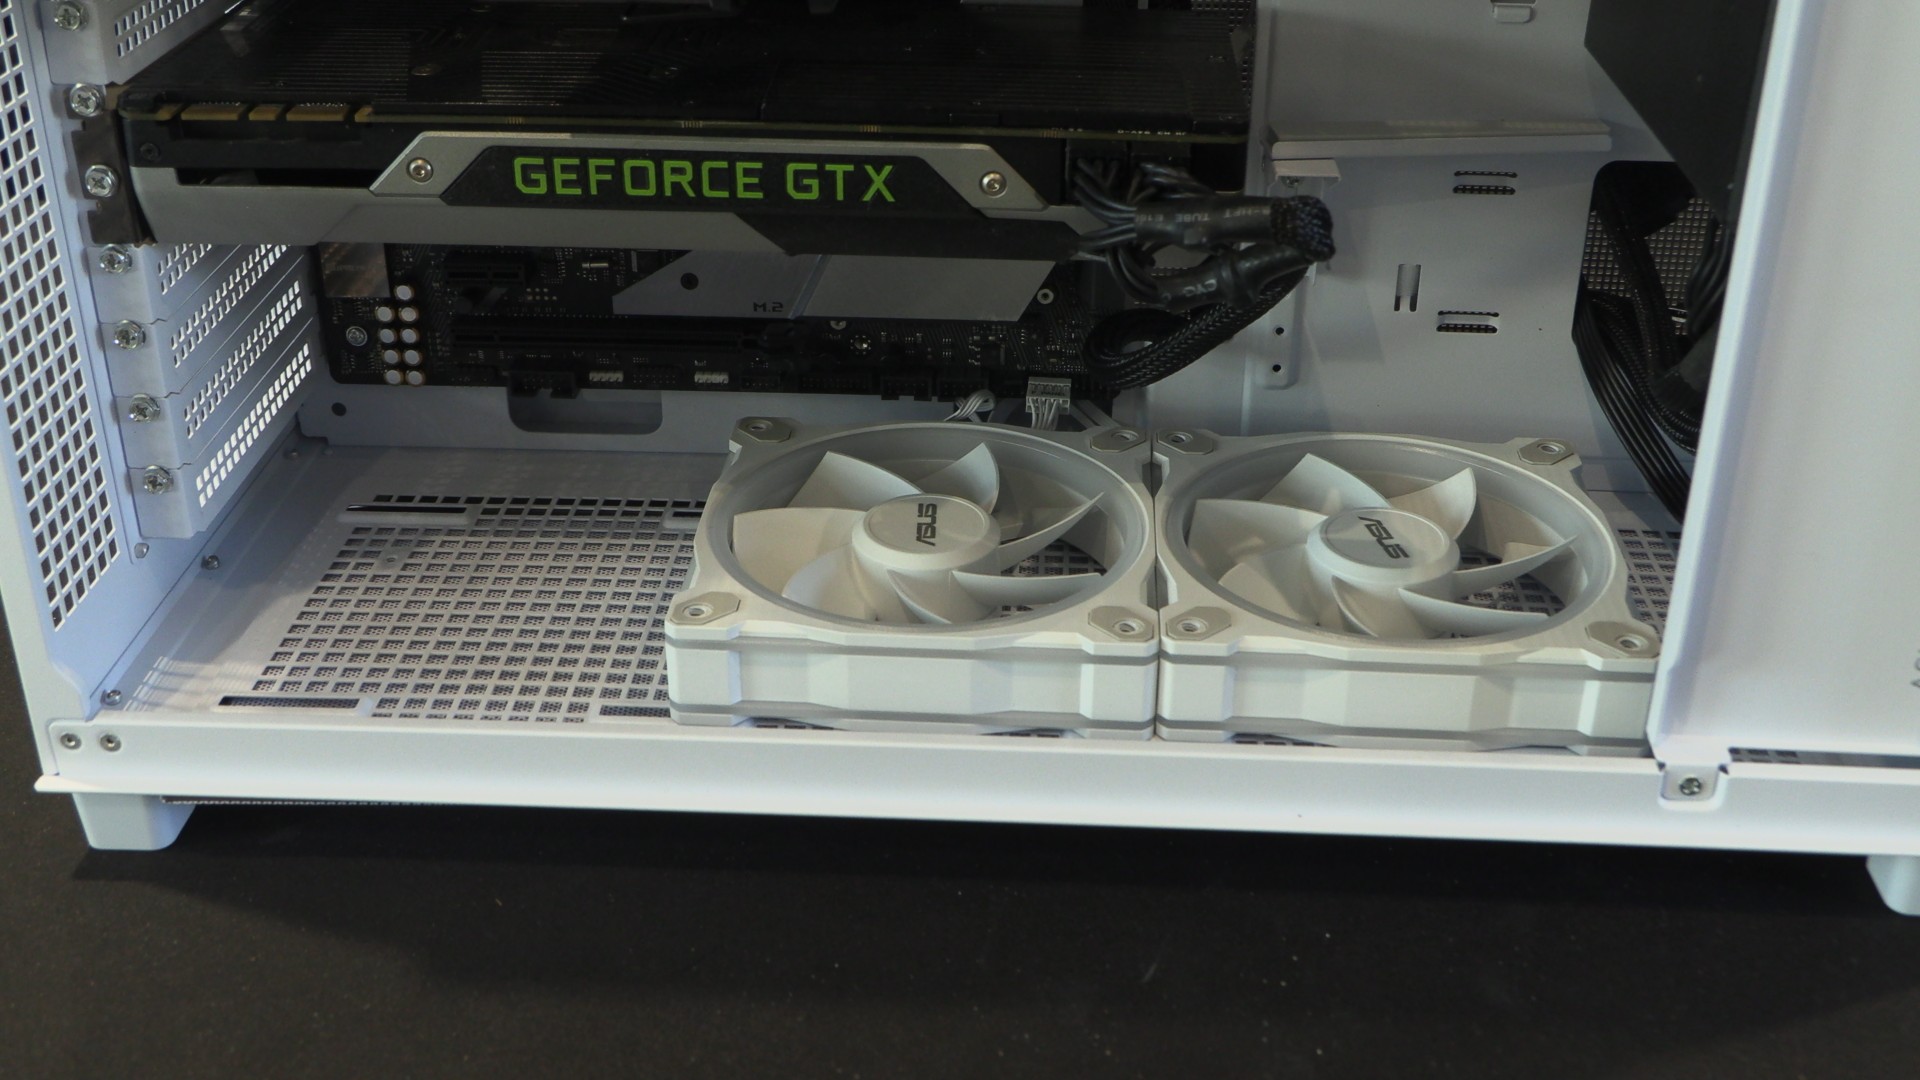
We oriented our fans this way to deliver optimal airflow for our chosen hardware.
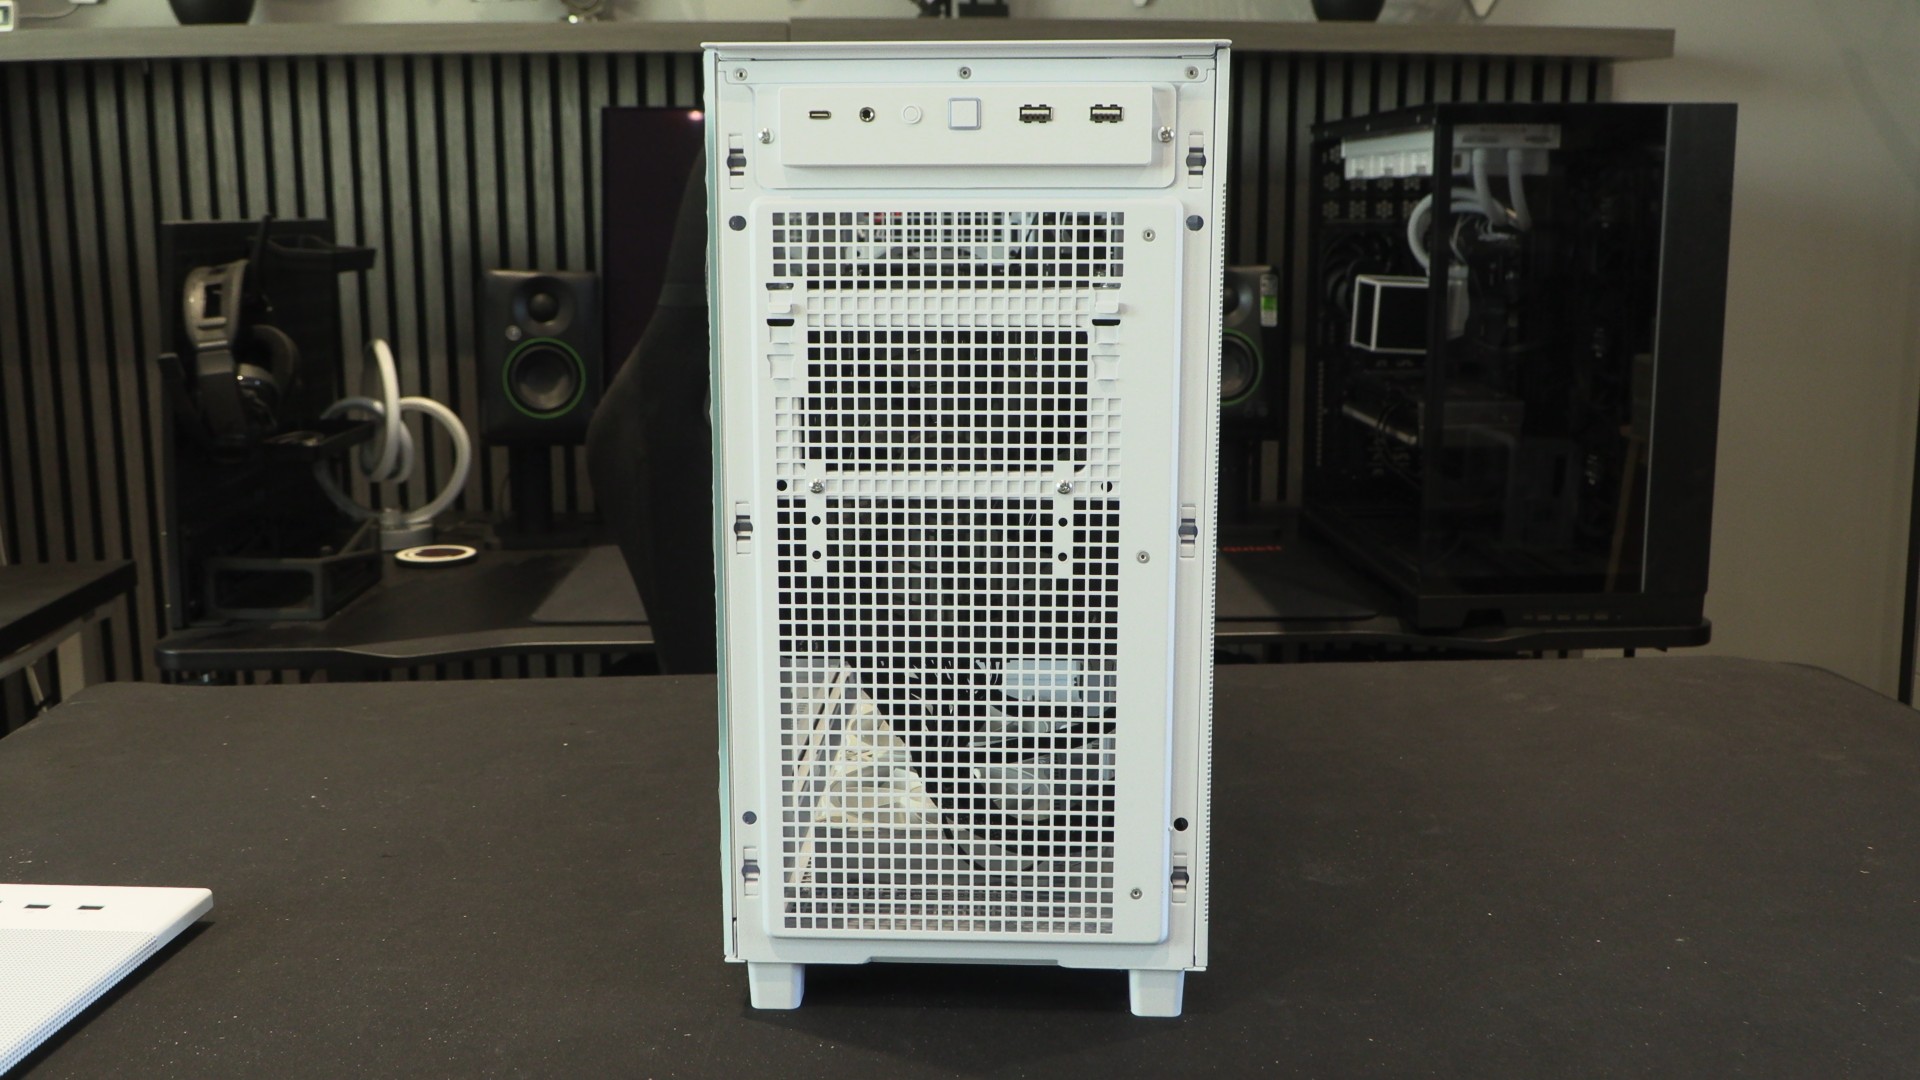
Vented rear
The rear of the AP303 is highly vented, allowing hot air to quickly escape the case. Note that there is a PSU power port at the top left of the case. This is an extention lead that extends to the AP303’s PSU mounting position.
Note that the AP303’s pre-installed fan is mounted at the rear of the case as an exhaust fan. Also note that this case’s side panels are tool-lessly installed, and can be easily removed. No thumb screws to mess with.
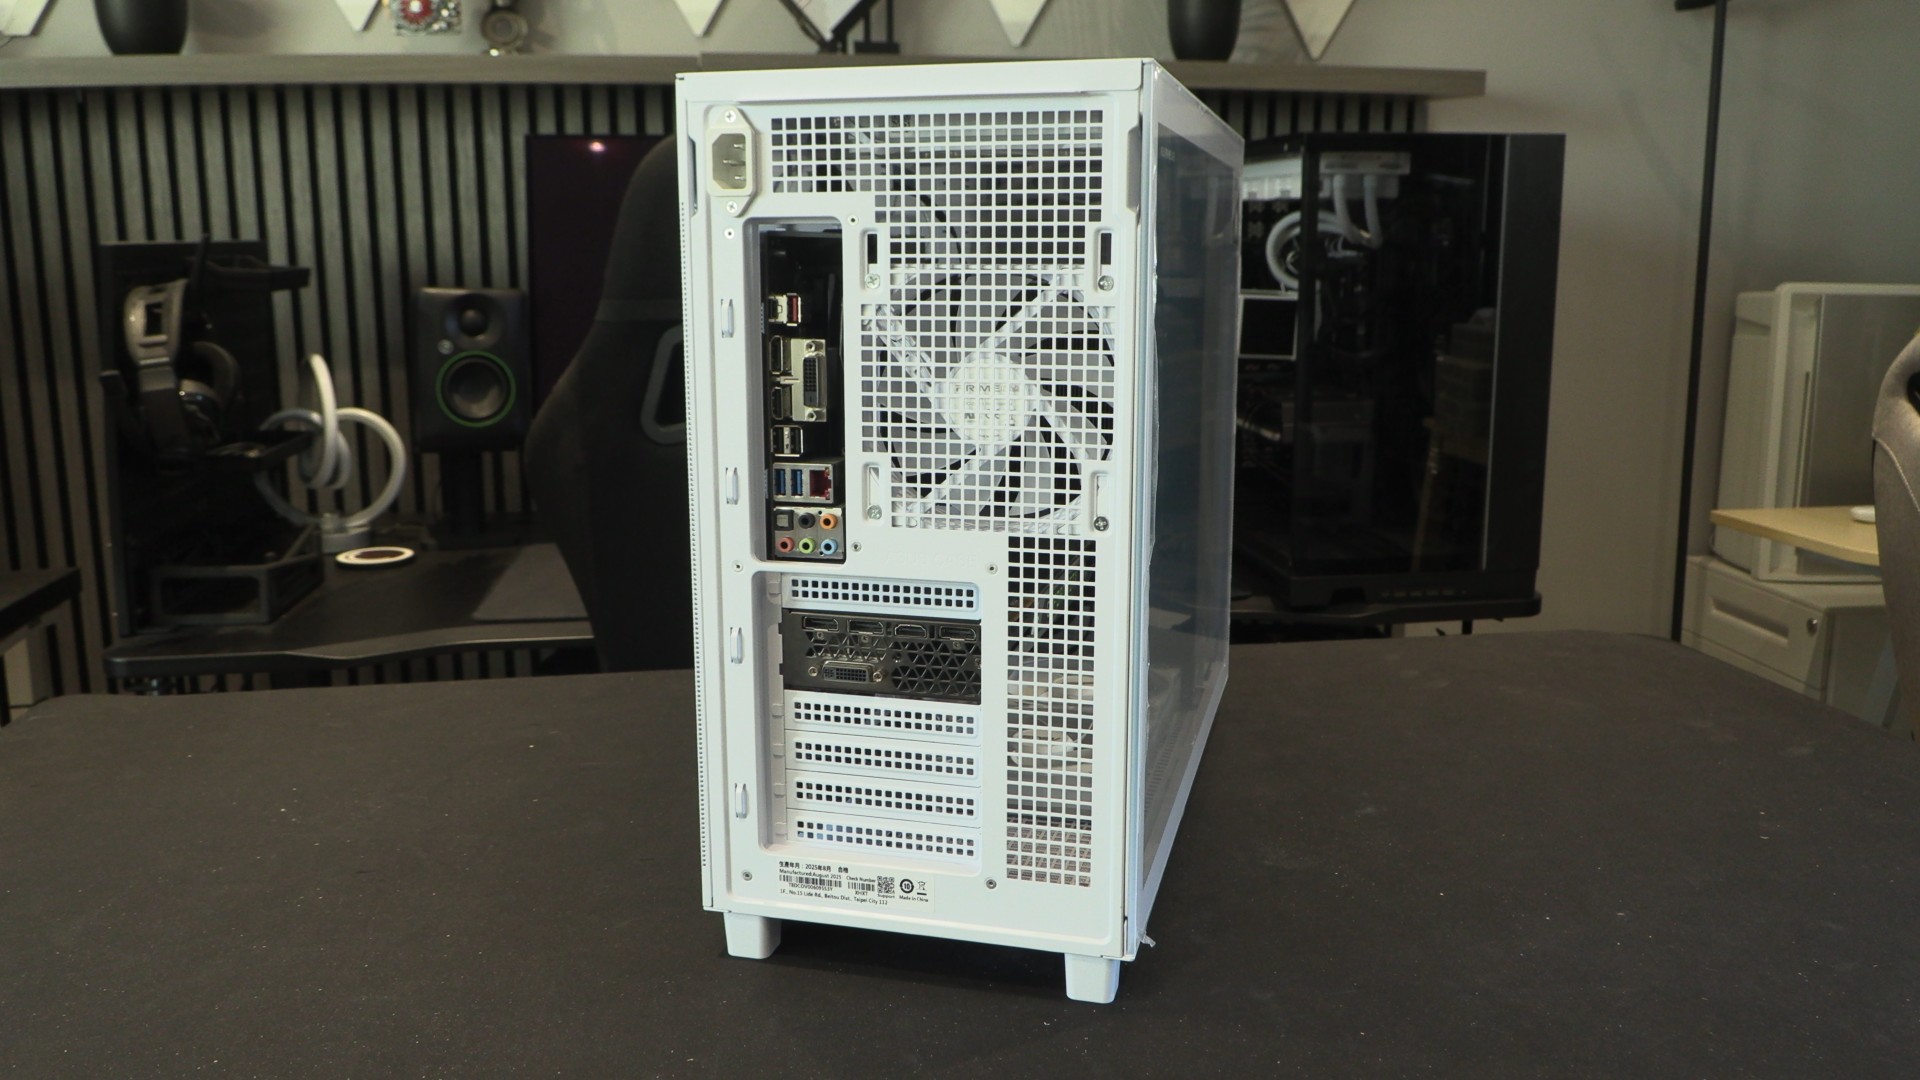
The right side panel of the AP303 is perforated for most of its length, matching the front of the case. If users opt for the AP303 with a mesh side panel (instead of tempered glass), the left side panel will also look like this. Note the “ASUS PRIME CASE” branding. Very subtle.