BitFenix Phenom M & ITX Review


Up Close: Interior
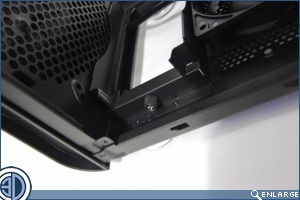
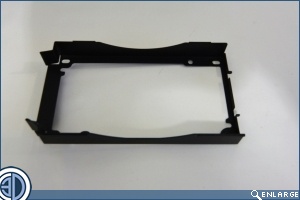
If you’re used to our normal formula for exploring the interior of a case, or you’re only happy with the predictability of the standard ATX layout then you’re in for a bit of a bumpy ride, as things are a bit all over the place inside the Phenom. Opening up the right hand panel you’re met with a removable rack which is able to house either 2×3.5″ drives on it’s interior surface and 3×2.5″ drives on its outer surface. With the drive rack removed we’re afforded a better view into the interior. To help orientate you, the PSU mounts vertically at the front of the case (left of the images) whilst the Motherboard sits inverted against the back wall of the case, with the CPU over the large cut out area.
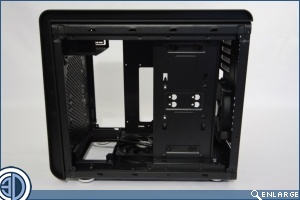
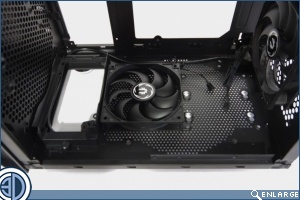
The PSU is located vertically in the front of the case after first attaching it to a mounting bracket. you can get long PSUs in here but do bear in mind you’re going to need to turn the cables round and down in the remaining roof space.
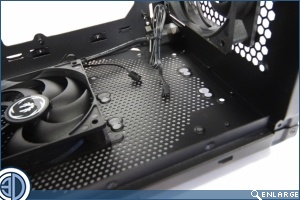
A single 120mm Spectre fan in included in the floor of the case and is set in the extract position. If you choose you can add a second 120mm unit, or a pair of 3.5″ drives, or mix and match between the two. For those of you familiar with the Prodigy chassis on which the Phenom is based, it should start to become a bit clearer exactly where this cases heritage lies, however in this Micro-ATX form factor, the large mesh area on the image below right is provided for the PSU should you choose to have it located with the fan on intake from the exterior of the case.
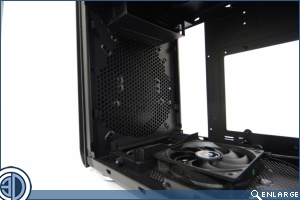
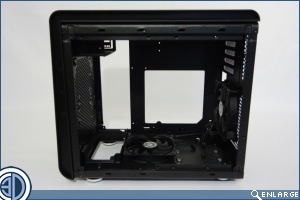
The only other ventilation is provided by a second 120mm Spectre fan located in the rear of the case. This can be swapped out for a 140mm unit or used in conjunction with a 120mm or 140mm Rad based AIO. This fan is again positioned as an extract making the case a negative pressure set up. If you want to experiment with airflow both fans can be easily re positioned.

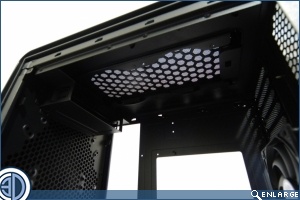
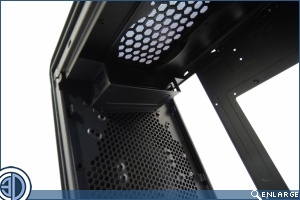
Up in the roof we can see a large cut out with mounting holes for 2x120mm fans, and as the inter fan spacing up here is 15mm you should be able to fit in a good many of the 240mm rad based AIOs. There’s also a bracket up here which at first view appears to be for a 5.25″ drive, but as there’s no external opening we can assume that it’s a legacy featuree from the Prodigy case which by means of an adapter can be used to mount a single 3.5″ or 2.5″ drive. If you’re looking to put a rad up in the roof then this bracket is going to need to be removed, which is easily done with just 6 screws holding it in place.
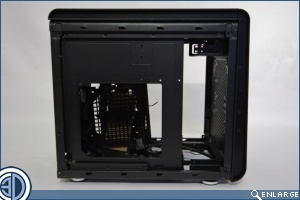
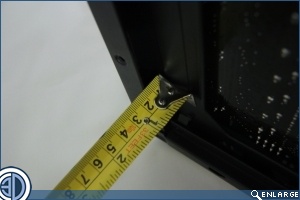
Turning the case around and looking at the reverse of motherboard area, we see that there’s not exactly a lot going on back here. A very meagre 14mm of space is available for cable management. We suspect this isn’t really going to be a major issue though as there aren’t any cable management holes to work with, so if you’re not going to be routing cables round the back you don’t really need the room to do it in do ya!