DimasTech Bench Table
Â
Introduction
For a while now there has been a hole in the case market. This hole was the need for chassis that accommodate open systems, allowing the end user to easily swap out major components while keeping the rest neat and tidy – one that could play a host to every kind of cooling one could think of. And on top of that, one that could look damn good.
Â
Well the legend that is Dimas has stepped up and made an attempt to fill this gap with the case that’s under the spotlight today here at OC3D, the appropriately named Dimas Bench Table Easy V2.
Â
 So without further a-do, let’s take a quick gander at the specifications of the case which were taken from Chilled PC’s product page:
Â
• Bench Desk realised in Metal sheet of 1,5mm
• CNC Laser Cuts
• Powder or liquid Coating
• Totally ” Made in Italy”
• Compatibility with motherboard ATX and Full ATX and MicroATX installation until 3 peripheral 5,25 inches (like DVD reader, fan bus,ecc..)
• Installation until 3 Hard disks (3,5 inches) and floppy reader, or 4 hard disks without floppy reader
• Special ventilation for the RAM zone via special support for a 92x92mm fan
• Support for ventilation in the socket zone via 80×80 o 120×120 fans
• Support for ventilation in the front VGA card zone via 80×80 o 120×120 fans
• Two buttons for Power Switch and reset
• Holes on the front and rear of the motherboard to allow the passages of cables and liquid cooling tube
• PSU supports,compatibility with Power supplies up to 22cm
• Lateral holes for the installation of a Triple, Double or Single fan radiator (Thermochill compatible)
• Rear space for installation of a compact liquid cooling system
• Thumbscrews thread M3 e 6-32
• Support for ventilation up to Video Cards,single or SLI/crossFire via 120x120mm fan
Â
Â
Packaging & Package
Â
The Bench table arrived in a rather large double thickness, plain white cardboard box. The box had a simple address label printed out from Chilled PC with the both the recipients & senders addresses marked on it.
Â
Â
Upon opening the box you are presented with a sea of polystyrene. Buried somewhere under that lot is your case, and It left me wondering if i was going to need a shovel. The contents were well protected against the brutal hands of todays couriers and it was nice to see the protection wasn’t massively over the top.
Â
Â
Enlisting the help of a few smaller cardboard boxes I went digging through the artificial snow to recover the parts of the case. First to be removed were the blue internals (for want of a better word). These comprised of the mount for the 5.25″ & 3.5″ drives, the PSU bay, a myriad of fan mounts and a pump/res mount. Also included was a slightly random sheet of foam that had no immediately obvious purpose. All the nuts, bolts and washers were held in a little, tightly packed plastic bag.
Â
Â
Â
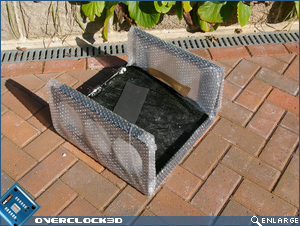
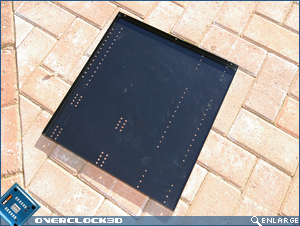
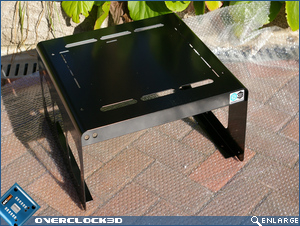
Once the middle was removed, along with yet more polystyrene, we got to the two main pieces of the case. The outer shell was shrouded in bubble wrap to give it that extra protected edge, while the bottom tray sat inside it. I continued to rummage through the polystyrene in hope of finding an instruction manual of some description, but alas there wasn’t one to be found. This proved to be quite a hinderance, which will be further illustrated over the page.


