


Gigabyte X570S Aero G Preview

Up Close – In Detail
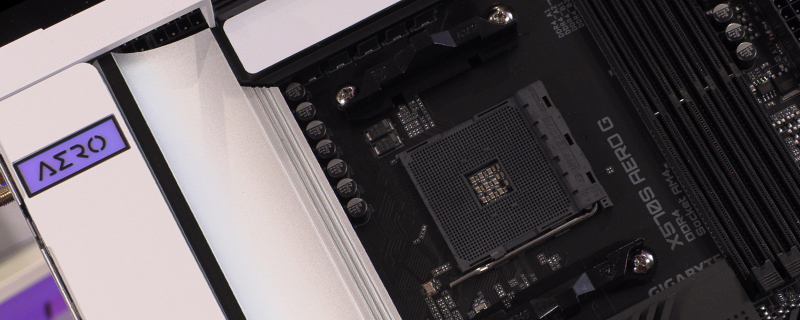
At the top left, surrounded by heatsinks, are the 8+4 12V CPU power inputs. Small fingers a must.

At the top right hand corner there are two CPU fan headers and a system fan header. Between those are the first two RGB LED strip headers that plug your lighting into the Gigabyte Fusion ecosystem.

Below the 24pin ATX connector are three more system fan headers for all that airflow goodness, and a Type-C USB front panel connector if you have a modern enough chassis.

As well as the passive cooling on the chipset the big change with the X570S is the inclusion of the Thunderbolt C header which you can see here.

On the bottom right corner are 6 SATA slots and a front panel USB 3.2 Type-A connector. You can also see the holographic effect of the Gigabyte chipset sticker.

At the bottom right we find the front panel connector cluster next to two more fan headers, one of which can double up as a pump header should you wish. Further along we find another Type-A USB 3.2 front panel header and the two USB 2.0 front panel connectors for controlling other RGB devices.

Moving on from the USB 2.0 headers we have two more addressable and regular RGB Headers for the Gigabyte Fusion lighting system as well as a header that lets you demo the lighting without plugging it all in. Lastly the front panel audio header should you still use 3.5mm jacked headphones.

The Wi-Fi 6 802.11AX has improved Antenna for better signal strength, adn as far as we can tell by following the cables is what is hidden here.

As well as the WiFi adaptor you can see the M.2 slots when you take off the heatsink cover. It’s also very obvious that there isn’t a fan keeping the chipset cool, which is the primary update on the X570S.

Come back soon for our full review and in the meantime discuss the Gigabyte X570S Aero G in our OC3D Forums.