MSI RTX 4090 Suprim X Overclocking Guide
Overclocking Method
Obviously the first thing you’ll need for an overclock is the famous MSI Afterburner utility. It currently opens showing 93% power, so hit reset to get the full power – as you saw on our first page – and then get down to business. As we’ll reiterate in our wrap-up, there are a few key things to remember. Firstly you have to just accept that your fans will be running their nadgers off. The RTX 4090 is the exact type of card that will annihilate anything you attach to it on air, even the excellent MSI Suprim cooler. This side of water, just tolerate your fans doing their best. Secondly, and most importantly, these are the settings for our card. Your mileage may vary. The RTX 4090 is a chunk of change. Don’t take these numbers as gospel, take the method and apply it in a manner that lets you feel safe and keeps the magic blue smoke in your card. Softly softly catchy monkey.
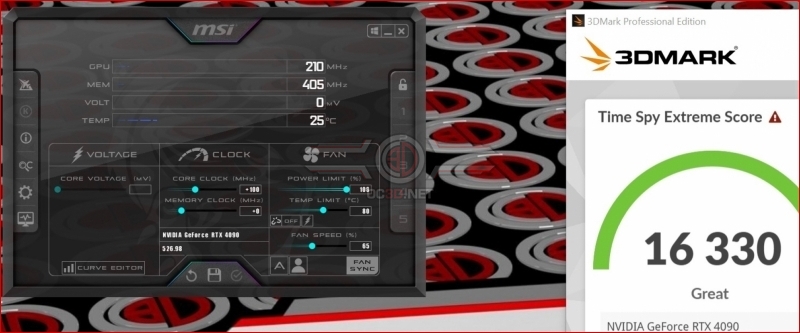
First up we’re just whacking the power limit right up. This will be consistent. We don’t want anything hindering our efforts, even if we’re not utilising it all. With Time Spy Extreme to run we can test how good our OC is, and how stable it is. It’s very easy to get greedy and go over the top. We’ve temperature limited our card, for obvious reasons even in the depths of a British Winter. With a 100 MHz core clock boost, we get 16330. A nice start.
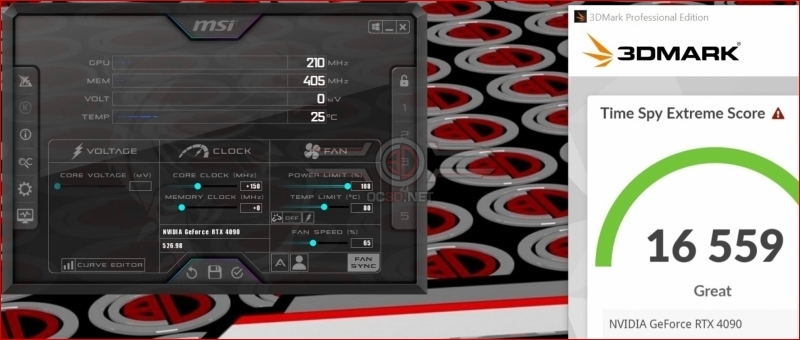
Adding another 50 MHz on top of that really unlocks things, seeing the score jump another 229 points to 16559. Just clock speed so far.
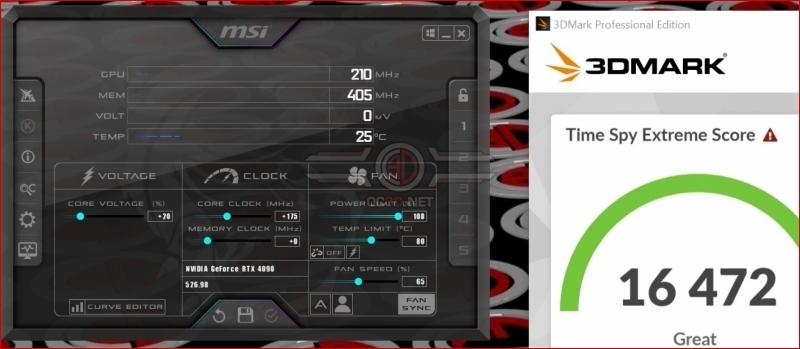
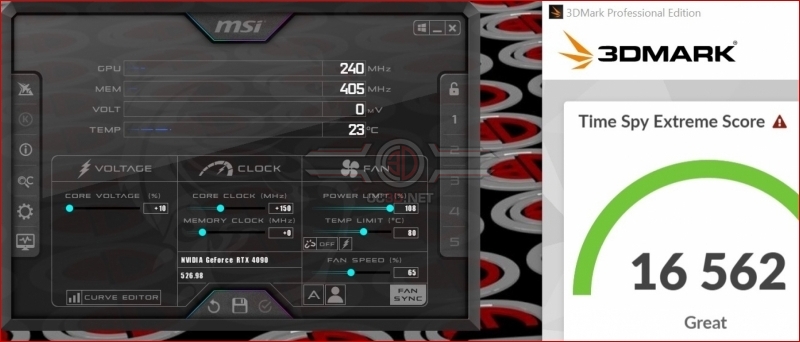
This is what we mean when we talk about cliffs and dropping off them. Greedy from the previous result we added a little core voltage to help push another 25 MHz (175 MHz total) and our Time Spy score went down to 16472. So the sweet spot is somewhere between these two attempts.
Backing off on the voltage and core speed we return back to where we were, but more stably and with a better average clock speed. Maximum boost is all well and good but, as we have said throughout this, average clock speed is what gives better results.
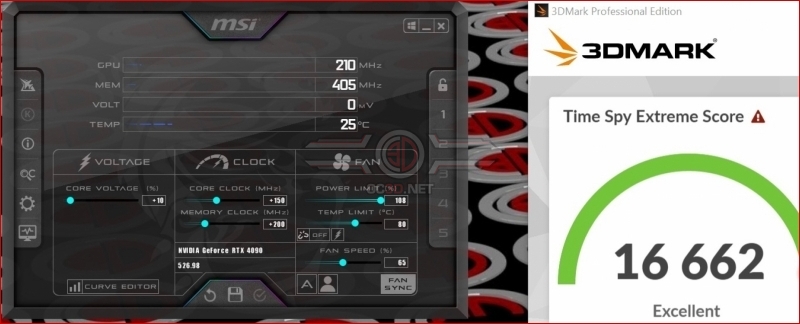
Keeping the GPU clock and voltage the same, it’s time to add a bit more speed to the GDDR6X. 200 MHz to begin with, as it’s less sensitive than the core. A whole 100 extra points. Lovely.
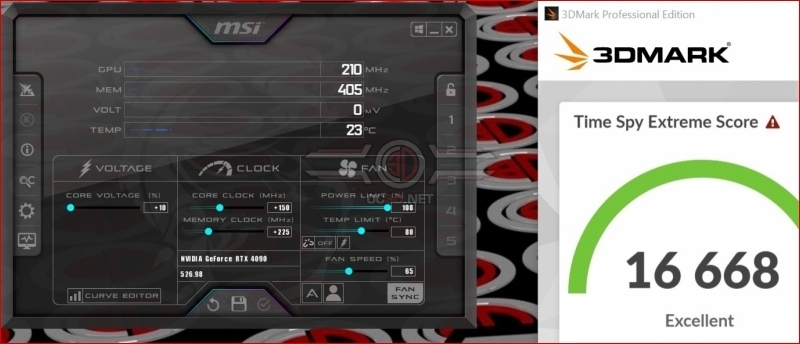
Lastly another 25 Mhz, just to smooth things out, gives us our final figure. 16668. Diabolic. Naturally we’ve given you the key moments, so it looks like we blundered through a bit, but we wanted to show the big steps and trust to your intelligence to extrapolate the middle bits. These are the bits you need to pay attention to. Only add volts once you’ve hit the clock cliff, or if your maximum speed remains high but the average drops like a stone. In this particular instance anything above these figures hit a wall, so going further without investing in liquid cooling is outside of sanity.
Let’s wrap up, and you can also watch the bossman talking you through this.


