


Corsair Dominator GT DDR3 1866 6GB Kit

Test Setup
For today’s testing we will be using the Gigabyte EX-58 UD5, a mid-range Core i7 motherboard from Gigabyte that will allow us to push the memory on test to its absolute limit. Here’s a breakdown of the rest of the components:
For today’s testing we will be using the Gigabyte EX-58 UD5, a mid-range Core i7 motherboard from Gigabyte that will allow us to push the memory on test to its absolute limit. Here’s a breakdown of the rest of the components:
Â
Processor
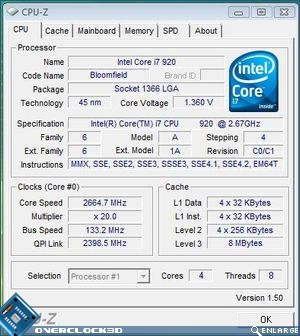
Intel Core i7 920 ‘Nehalem’ @ 2.66Ghz
Intel Core i7 920 ‘Nehalem’ @ 2.66Ghz
Motherboard
Gigabyte EX58-UD5
Memory
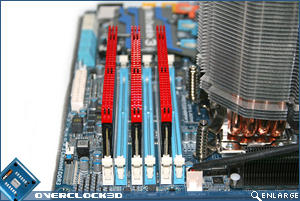
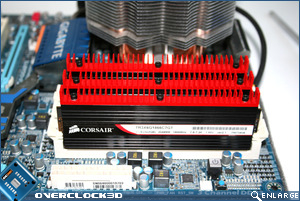
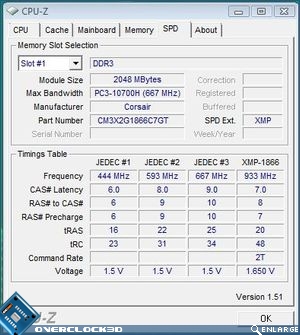
Corsair Dominator GT CL7 1866MHz 7-8-7-20 3x2GB kit
Corsair Dominator CL8 1600MHz 8-8-8-24 3x2GB kit
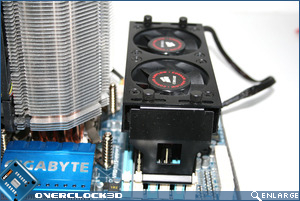
Graphics Card
Nvidia 280GTX
Drivers
GeForce 180.60
PSU
Gigabyte Odin 1200w
Operating System
Windows Vista Ultimate 64bit SP1 + Updates
Â

Â
I appreciate the UD5 is perhaps not the best colour co-ordinated motherboard to use with the Dominator GT ram, for that you may wish to consider the Foxconn Bloodrage which matches the colour scheme of the Dominator GT perfectly, as would the lush but highly expensive EVGAÂ classified. But IÂ digress.
Â
Setting the ram up proved a little troublesome. For some bizarre reason I could not get the full 3x2GB kit to POST. Despite a couple of BIOSÂ changes the UD5 refused to POST with anything but a single stick. Even entering the correct default SPD settings or indeed utilising the X.M.P profiles on the sticks made no difference. IÂ wasn’t until IÂ moved the modules around, using the same slots but alternating the positions of the modules did IÂ have success in getting the setup to post. This might be something you may wish to remember should you encounter the the same difficulties.
Â
I am sad to report that the cooler is not that much quieter than the previous 3 fan version. While it may have two larger fans there is still the whooshing sound of air passing over the blades which is akin to an ATIÂ graphics card under load conditions. They do however push a lot of air onto the Dominators so it goes without saying this noise can be justified with the extra cooling the fan provides. In testing the modules certainly got hot when under load so the justification of using a memory cooler is certainly warranted should you wish to extend the lifetime of the Dominator kit.
Â
For testing the memory we used a number of synthetic benchmarks and games:
Â
Synthetic Benchmarks
- Lavalys Everest 4.10
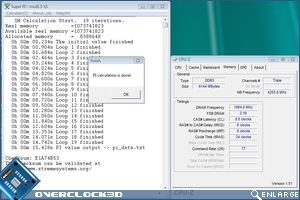
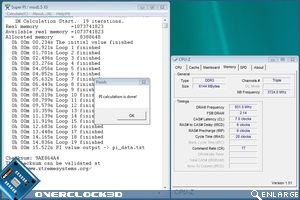
- SuperPI mod_1.5
- Sisoft Sandra 2009
3D Benchmarks
- 3DMark Vantage
- Far Cry 2
Â
For the run of benchmarks, we will be comparing the 1866MHz 6GB Dominator GT to the original Corsair Dominator kit.
Â
Â
Â
Overclocking
Â
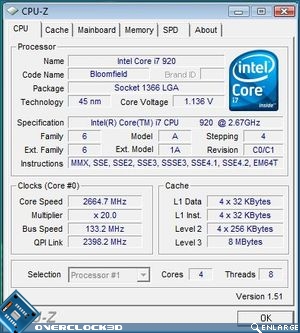
Starting from scratch we disabled on the settings that may affect the overclocked settings such as Intel Speed Step as well as disabling the C-State settings which may also affect some of the results in the benchmark testing phase of the review. Here’s how the sticks look at stock speed:
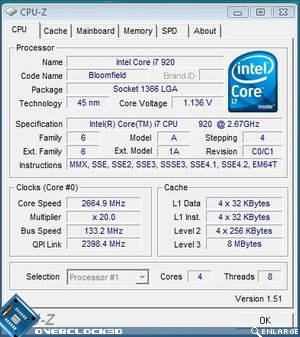
Â
Â
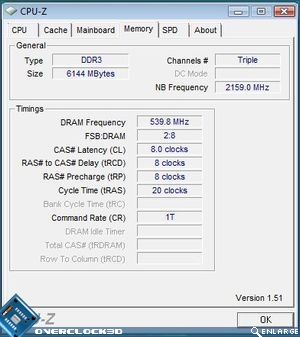
The above screen shots are what the Gigabyte UD5 motherboard decided to set as a ‘stock’ setting basing it’s findings on the SPD settings on the DDR3 kit. Not content with these settings as these are not what Corsair advertises, I delved back into the BIOS and set the X.M.P to profile 1 (programmed via the modules) and here’s what they came up with:
Â
Â
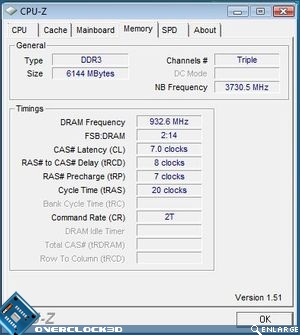
Now that’s more like it! However, something still wasn’t right as the tRAS setting was 25 as opposed to the advertised setting of 20. IÂ would also like to have seen the Command Rate running at 1T so I decided upon setting the modules up myself rather than rely on the XMP settings.
Â
Â
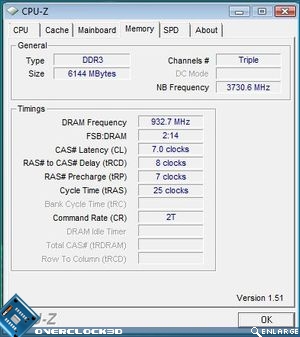
Finally the correct settings are shown in CPU-Z. Why XMP did not set these settings IÂ cannot say as JEDEC clearly shows the XMP setup. This is possibly a quirk with the UD5 BIOS (F7) which is the latest official BIOS available from Gigabyte. Never the less, these are the settings IÂ will be using in today’s benchmarks.
Â
So how far did IÂ manage to push the 6GB kit?
Â
Â
2000MHz was easily attained with the stock settings with no need to reduce latencies or increase voltages. However, to push them any further and still have some degree of stability, the Vdimm was pushed up a couple of notches to a still conservative 1.7v. With this voltage now powering the modules, IÂ was able to attain a blistering 2128MHz! Better still, the latencies only needed relaxing ever so slightly to reach this. Sadly, relaxing the timings any further did not yield any notable increases in bandwidth but IÂ was very pleased with the speed already achieved. I did manage to lower the latencies below stock to 7-6-6-20 while maintaining the stock bandwidth of 1866 which again is quite an achievement at this speed. Well done Corsair, some damn fine performance is to be had with this kit!
Returning the settings back to their stock values I then ran our suite of memory benchmarks to see how the modules compare. Let’s see how IÂ got on…