CoolerMaster MasterAir Pro 4 Review

Performance and Testing
The test set up consisted of the following
Intel Kaby Lake i7 7700K
4.8GHz @ 1.25v, 5.0GHz @ 1.3v
Asus Maximus VIII Ranger
2x8GB Corsair Vengeance LPX Memory 3200MHz
CoolerMaster V650
Corsair Force GT 60GB
Coolermaster MasterCase Pro5
As was the case with our previous set up, we’ll be testing our coolers at varying levels of overclock and increasing levels of voltage. The increase in volts means an increase in heat within the CPU, and it’s this heat that the coolers need to dissipate.
Continuity is very important in testing, and for this reason we keep as many of the potential variables as locked down as possible. We will be using OCCT in Linpack X64, AVX compatible with all logical cores tested and 90% free memory utilised. The test is set up to run automatically with just a few clicks to set it going. A 10 minute idle followed by 30 minutes of testing and a 5 minute cool down is the order of the day and brings the total test time per clock speed to 45 minutes. So as to remove subjectivity in determining whether a CPU has failed, OCCT is set to stop the test and register a fail should the max temp exceed 80 degrees. As with the socket 2011, in testing we noted that if even just one of the cores exceeds 82 degrees OCCT halts the test and a fail is recorded.
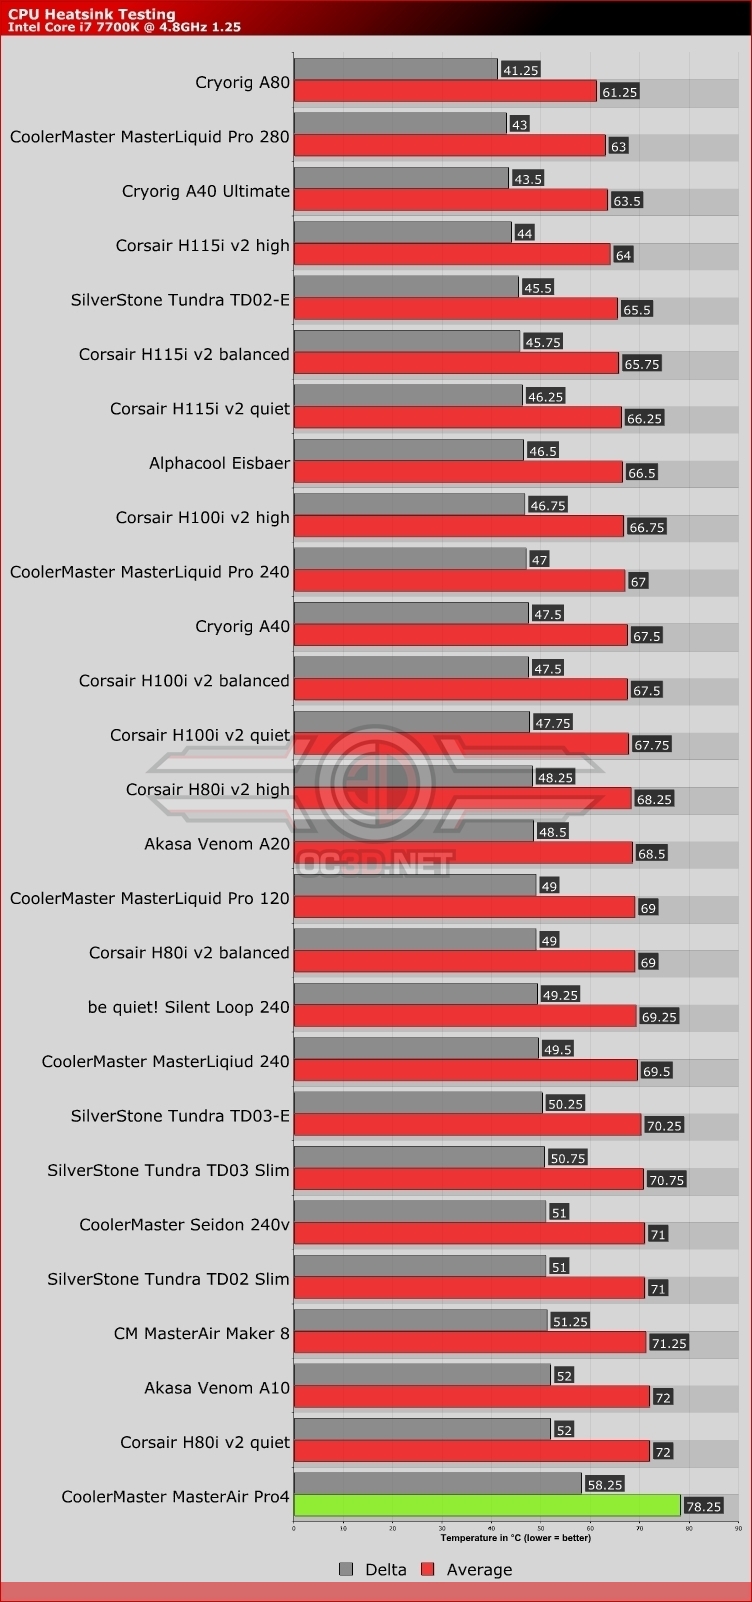
4.8GHz
Having had a fiddle with the volts we achieve a nice stable 4.8GHz overclock at 1.25 Volts (stock for most boards). This level of overclock is going to give us a pretty good idea of how well coolers will perform when under a bit of stress. We’d expect everything to make it through, however some may come close to the automatic 80 degree cut off wire.
5.0GHz
A bump to 1.3v saw us acheive a solid 5.0GHz Overclock. Only the very best coolers are going to perform well with this amount of heat being pumped into them, and even then, some of them will be close to the automatic cut off point. 5.0GHz might not seem like a huge increase on 4.8GHz, but the additional heat generated by that seemingly small bump in core voltage does seem to challenge the coolers that bit more, and so as before it’s here we start to separate the men from the boys, as lesser coolers may not able to disperse the increased heat effectively. Only the cream of the crop will excel at this level. Not unexpectedly, the Pro4 Didn’t make it into this elite group.
Sky Lake Testing
The test set up consisted of the following
Intel i7 6700K Stock (4.2GHz)@ 1.2v, 4.6GHz @ 1.3v, 4.7GHz @ 1.344v, Asus Maximus VIII Ranger, 2x4GB Corsair Vengeance LPX Memory CoolerMaster V650, Corsair Force GT 60GB Coolermaster MasterCase Pro5
As was the case with our previous set up, we’ll be testing our coolers at varying levels of overclock and increasing levels of voltage. The increase in volts means an increase in heat within the CPU, and it’s this heat that the coolers need to dissipate.
Continuity is very important in testing, and for this reason we keep as many of the potential variables as locked down as possible. We will be using OCCT in Linpack X64, AVX compatible with all logical cores tested and 90% free memory utilised. The test is set up to run automatically with just a few clicks to set it going. A 10 minute idle followed by 30 minutes of testing and a 5 minute cool down is the order of the day and brings the total test time per clock speed to 45 minutes. So as to remove subjectivity in determining whether a CPU has failed, OCCT is set to stop the test and register a fail should the max temp exceed 80 degrees. As with the socket 2011, in testing we noted that if even just one of the cores exceeds 82 degrees OCCT halts the test and a fail is recorded.
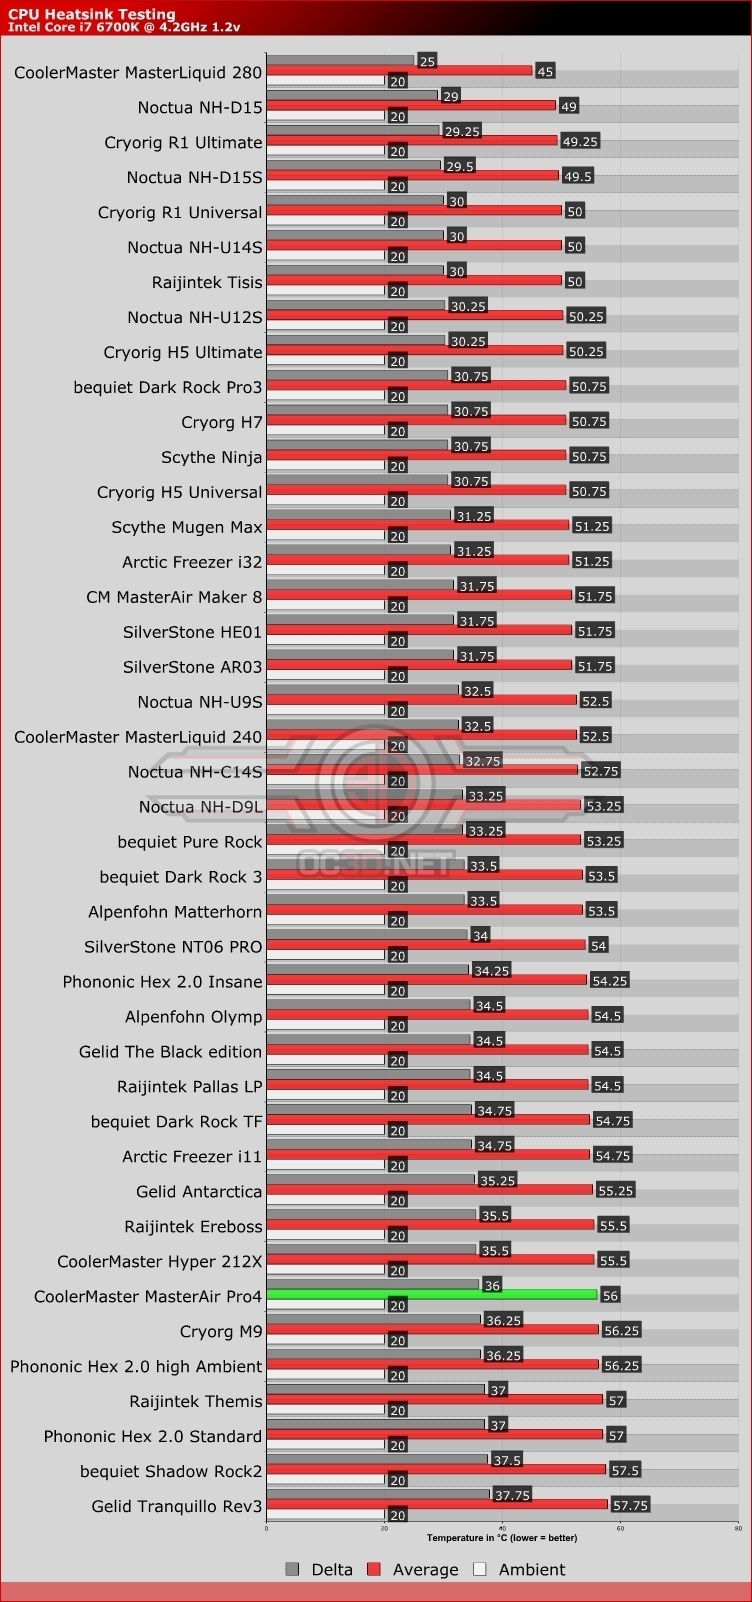
4.2GHz
It makes sense to start with the stock speed, and with stock volts, as this represents a good baseline from which to measure our results. As always, rather than leave the setting on Auto, we’ve actually dialed in the stock voltage we require, in this case it’s 1.2 volts for a nice stable vanilla 4.2 GHz. Although these low volt low overclocks represent a good baseline to start from, they’re not where the actions at, so for that we’ll need to add more volts.
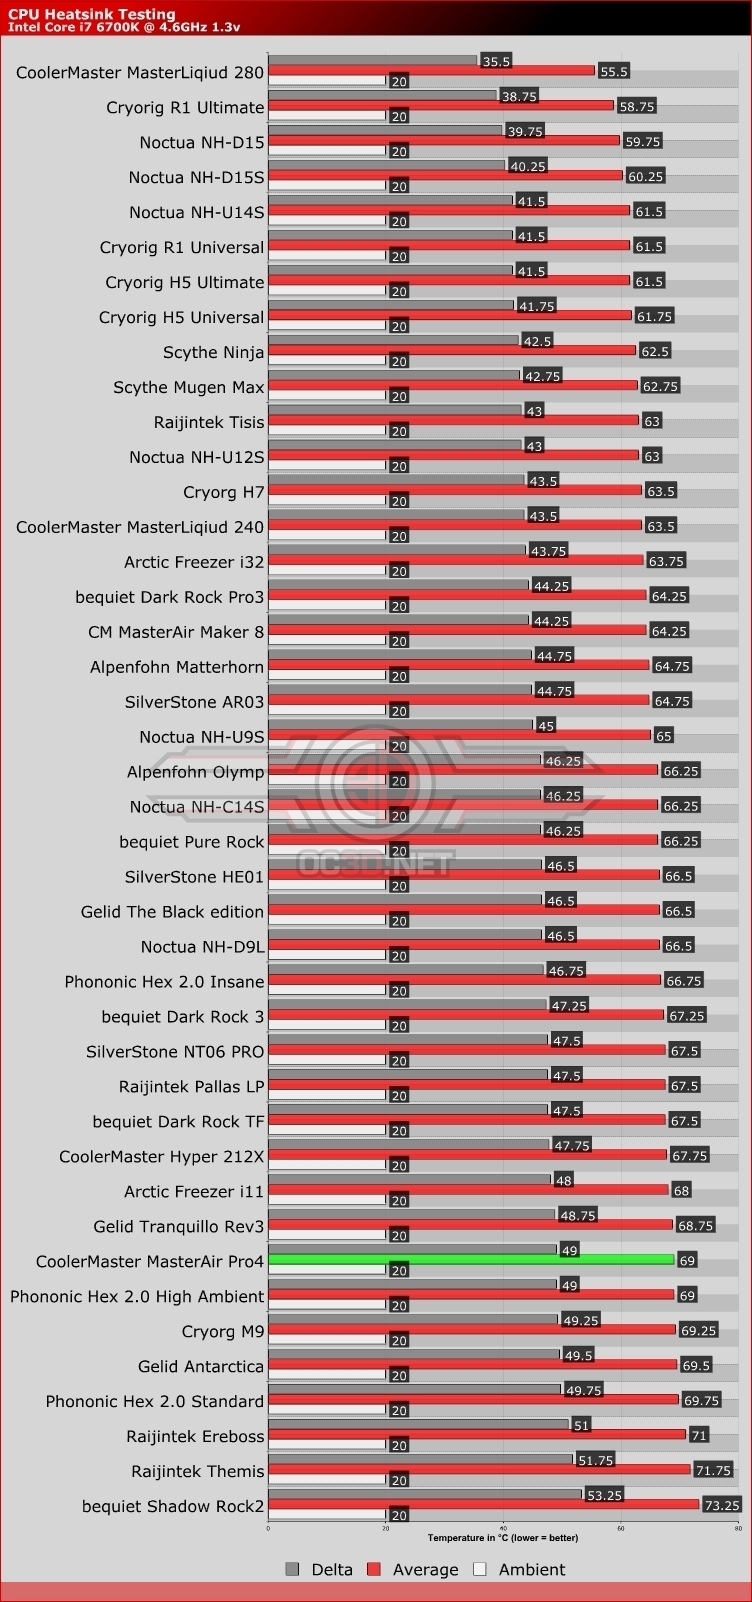
4.6GHz
To get to 4.6GHz we had to up the volts to 1.3Volts At the higher levels of heat generated by the increase in voltage required for the 4.6GHz overclock, fan performance, although still a factor becomes less critical, replaced instead by a coolers ability to conduct the heat up the heat pipes and more crucially the total surface area of the fins enabling convection to the atmosphere. In the case of AIOs and water cooling the surface area of the radiator and the efficiency of the contact plate begin to play more of a factor.
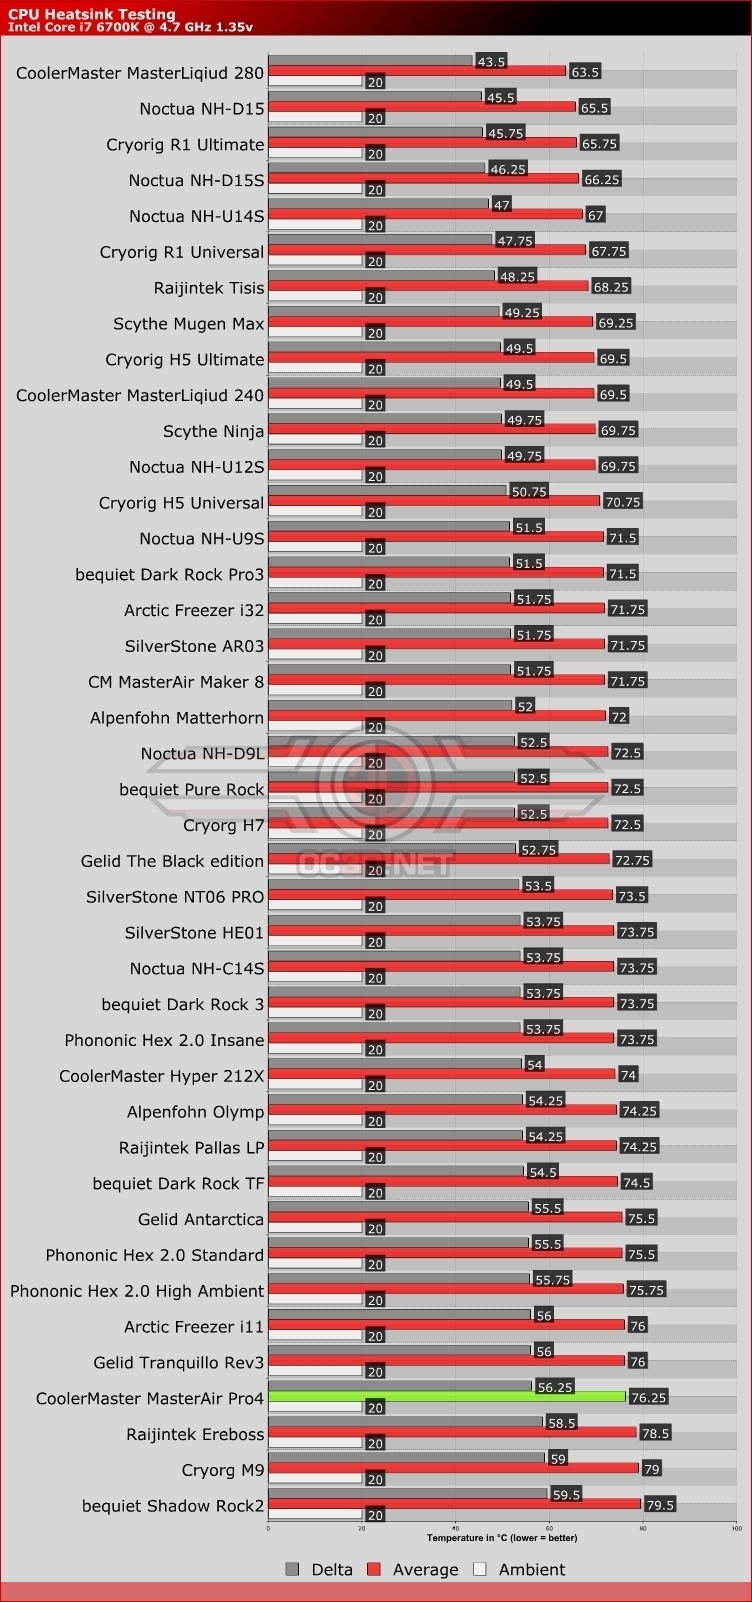
4.7GHz
Upping the volts still further we achieve a stable 4.7GHz overclock at 1.35v. This might not seem a huge increase on 4.6GHz, but the additional heat generated by that seemingly small bump in core voltage does seem to challenge the coolers that bit more, and so as before it’s here we start to separate the men from the boys, as lesser coolers may not able to disperse the increased heat effectively. Again we see a jump of 10 degrees or so from the figures at 4GHz. Only the cream of the crop will excel at this level.