Published: April 16, 2009 |
Source:
Gigabyte |
Author:
Rich Weatherstone
Gigabyte EX58-UD4P X58 Motherboard
Test Setup
To ensure that all reviews on Overclock3D are fair, consistent and unbiased, a standard set of hardware and software is used whenever possible during the comparative testing of two or more products. The configuration used in this review can be seen below:
Processor: Intel Core i7 920 (2.66Ghz)
Motherboard: Gigabyte EX58-UD4P
Memory: 6GB Corsair DDR3 @ 8-8-8-24 1600Mhz
Graphics Card: NVidia GTX280
Power Supply: Gigabyte Odin 1200W
CPU Cooling: Stock Intel Cooling
Hard Disk: Hitachi Deskstar 7K160 7200rpm 80GB
Graphics Drivers: Geforce 180.60 CUDA
Operating System: Microsoft Windows Vista Ultimate x64 SP1
During the testing of the setup above, special care was taken to ensure that the BIOS settings used matched whenever possible. A fresh install of Windows Vista was also used before the benchmarking began, with a full defrag of the hard drive once all the drivers and software were installed, preventing any possible performance issues due to leftover drivers from the previous motherboard installations. For the 3DMark and gaming tests a single card configuration was used.
The memory spacing was ample and should not prevent over sized coolers being fitted. The Gigabyte EX58-UD4P features a multitude of mini LED’s that all have a purpose. The Blue LED’s near the DDR3 slots signify CPU Frequency with no LED’s lit meaning stock – I managed to light all 5 up! Just above these LEDs are 5 green, 4 yellow and 4 blue LED’s all in a row. These LED’s highlight the amount of CPU Phase Load. Again I managed to load them all up. There are also phase LED’s for the memory, Northbridge and South bridge. Below right you can see the NB voltage indicator which cycles through green (safe), yellow (moderate) and red (Thermo-nuclear?). The over sized QPI (Northbridge) cooler meant these LED’s were slightly obscured, revealing just the green LED, looking from the side however, showed that the colour was actually red. Maybe it’s time I donned that radiation suit!
These little LED’s are a nice little touch, especially for those who are insistent on using AUTO voltages when overclocking as they give and indication of the level of voltages being used for any given overclock. The majority of these LED’s can however, be turned off should you prefer.
To guarantee a broad range of results to best evaluate the motherboards performance, the following benchmark utilities were used:
Synthetic CPU Test • Sisoft Sandra 2009
• PassMark CPU test
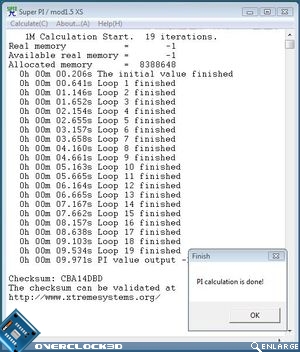
• SuperPI 1m, 8m, 32m
Memory Test
• Sisoft Sandra 2009
• Everest 4.60
File Compression & Encoding
• Sisoft Sandra 2009
• 7-Zip File Compression
• River Past ViMark
Disk I/O Performance
• HDTach 3.0.4.0
• Sisoft Sandra 2009
3D / Rendering Benchmarks
• Cinebench 10
• 3DMark 05
• 3DMark 06
• 3DMark Vantage
3D Games
• Crysis
• Far Cry 2
• Call of Duty 4
Overall System Performance
• PCMark Vantage
Power Consumption
Power consumption is an aspect often forgotten when it comes to enthusiast motherboards but in todays climate, with rising utility bills special consideration needs to be taken when choosing you components as over a period of time, one components can prove to be much more expensive than another over its lifetime. Power consumption was measured at the socket using a plug-in mains power and energy monitor. Idle readings were taken after 5 minutes in Windows. Load readings were taken during a run of 3DMark Vantage.
The Gigabyte EX58-UD4P was exceptional in this department using the lest power when idle and when under load conditions. No software utilities were used either which, thanks to the 6-Gear utility of Gigabyte could lower power consumption even further by altering the power phase of the motherboard.
Overclocking
Here’s a couple of the obligatory CPU-Z screenshots at stock:
Using a respectable Vcore of 1.40v set in the BIOS, the remainder of BIOS voltage settings were left in their stock state to ensure equality throughout the testing. Here’s what I managed out of the motherboard:

Not a bad showing by any means! 4200MHz was the maximum I managed out of the Gigabyte UD5 and despite the UD4P being a slightly cut down version of that board it has managed the same overclock regardless. Vdrop/droop was nothing too much to worry about with a maximum 0.012v droop recorded during testing (loadline enabled). It wasn’t all plain sailing though as the stock BIOS gave some pitiful results maxing out at 3.5GHz. However, a BIOS update to the official F7 allowed the overclock above with relative ease. BIOS recovery was mediocre, sometimes it was fine, others, it was not. Memory Multi overclocking tended to result in none boot scenarios which only a CMOS clear would rectify. CPU clocking on the other hand recovered with relative success. Once you have your favoured settings, the Gigabyte BIOS allows you to back it up by creating a settings profile (F11) and returning to this profile at a later date and time should you wish by simply pressing F12.
Returning the Gigabyte EX58-UD4P and the CPU to their stock settings I then ran the standard suite of benchmarks and compared the boards performance to a number of other X58 motherboards. Let’s see how it got on…


