DFI X48 UT-T3RS Motherboard
BIOS Options
Â
DFI have long been an overclockers favourite so it should come as no surprise that the X48 UT-T3RS BIOS is yet another complex and well thought out BIOS from AWARD. Before beginning the overclocking I wanted to make sure I had the latest official BIOS (X48BD725)Â available from DFI. The flashing procedure was pretty straight forward but could be made a lot easier. I actually used the tried and tested method of using a floppy but if you configure a USB stick correctly you can flash by that means. Or if you are feeling brave you could always use the Windows flashing method. I would have thought by now that DFI would have adopted a similar format from ASUS whereby you just put the BIOS on a USB stick and use a utility in the BIOS itself to flash but sadly the DFI doesn’t have that option. Not a big problem but something that could be improved upon nonetheless.
Â
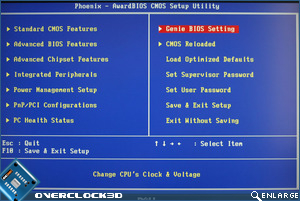
The boot up screen is similar to that of the packaging being golden in appearance and actually quite pleasing to the eye. The usual .del key gets you into the BIOS itself and from the main screen we see the familiar layout of most Award BIOS. DFI have opted not to make the overclocking section (which we are all most interested in) the first section, deciding instead to go against the norm and put the section in its usual place, after PC Health status.
Â
Â
Â
Â
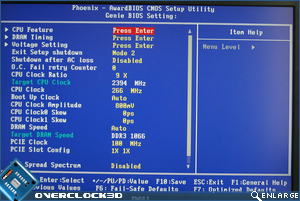
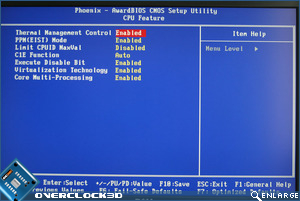
The Genie BIOS section though is where we want to be and navigating to that area by the use of the arrow keys we become initially disappointed as the Genie BIOS area is, from the outlook at least, basic by DFI standards. Fear not though because most headers in here each have their own subsection depending on what components you wish to tweak. Starting with the CPU features, all the favourites are there as well as the option to disable specific cores should you wish.
Â
Â
Â
Â
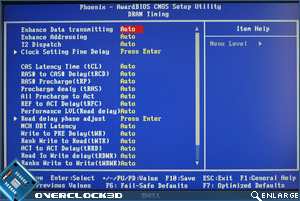
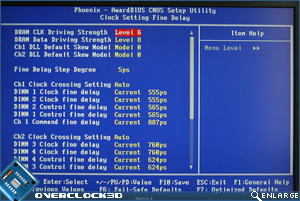
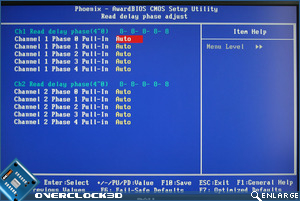
Now this is more like the DFI’s of old. The DRAM timing section is mind blowing. Every feature any tweaker could want is in there as well as some settings that even the most knowledgeable clocker would struggle to explain. The sheer amount of settings available can become a little daunting as there are simply so many options available one could become lost in there! Each setting has to be scrolled through which is a little disappointing as I find it much easier to input the timings directly but at least this does give an idea of the possible settings. Along with the usual main timings there are a multitude of subsection timings as well as further subsections such as phase adjustments, and clock fine delay options.
Â
Â
Â
Â
Â
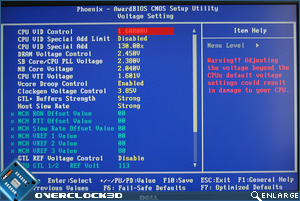
Above right we see the bulk of the voltage settings (all set to there maximum available for your pleasure). Excessive is one word, obscene is another and I would tend to lean towards the latter when describing the amount of voltage available to pump through your precious components. If I had to choose one board with which to destroy a CPU or DDR then this would be it as the ridiculous amount of power available is matched only by the multitude of options available with which to torture your components. I would prefer to have seen an inbuilt calculator instead of the percentage based CPU VID special add as, if like me, you were not the best mathematician, it can be a pain working out the percentage increase you wish to add and could inadvertently fry your CPU. Still, having that option in the first place is a bonus in itself and can work two-fold. One, by fine tuning the voltage required and two, by means of adding additional voltage should you feel 1.6v is not enough.
Â
 Â
Â
Â
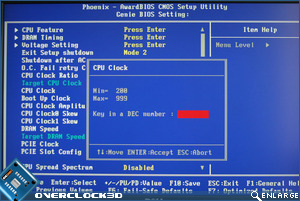
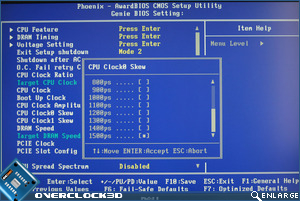
One of the few settings that can be input directly is the CPU clock (FSB) with a range of 200-999. I doubt there is any CPU in the foreseeable future capable of reaching a 999 FSB but like everything else in this BIOS, the option is there. Rounding off the settings available in the Genie BIOS are settings such as the CPU Clock Skew and GTL reference settings. A nice addition to the options available is a boot up clock allowing you to set a CPU clockspeed to POST before the mainboard then sets the true clockspeed allowing you to get past the non-boot scenario of a failed overclock. We’ve all been there, an FSB can be set in windows for those suicide runs but getting the board to boot at those settings can be troublesome. This setting eradicates that problem. You can even set the number of times the board will try and apply those ambitious settings before reverting to a last good boot scenario once more proving the DFI is the ultimate in tweakability.
Â
Â
Â
Â
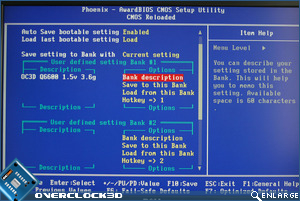
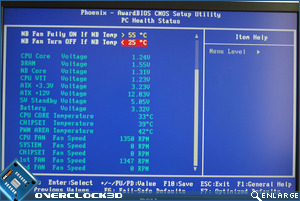
Once you have found those golden settings you can back them up in the  ‘CMOS reloaded’ with a customisable title as a gentle reminder of what settings you used. Ideal for those who always forget to right those settings down and a very neat way of reloading those settings after a CMOS clear. The DFI board is also presents itself very well in the PC health section. All too often we see some boards fall down in this department where they give you a multitude of options to tweak but then you cannot see what effect this has on temperatures, which given the silly amount of voltage the DFI offers it would be prudent to keep a close eye on this area.
Â
So a very thorough BIOS and, dare I say, over the top? While a BIOS that is fully featured is a most welcome sight at OC3D we also like a BIOS to be easy to follow and easy to use. The DFI BIOS is neither and takes some time to reach the same standards other boards manage with just a few settings. I have no doubt that if you are looking for that nanosecond quicker PI time then this is the BIOS for you but for the average user, this BIOS is quite scary. Having said, that most options can be left to their own devices in AUTO configuration, so it should not be seen as a negative. I found myself fiddling with settings just to see what effect they had which for the most part had little or no effect and sometimes resulted in a non boot scenario while other settings had a massive effect on stability. It’s just a shame the manual does not go into any great depth each setting is used for and for an explanation then a time consuming search is required along with a little guesswork. I don’t class myself a novice overclocker but even I was daunted by the sheer magnitude of the options available.
Â


