


Steam Deck SSD Upgrade Guide – Building a 1TB Steam Deck

Building a 1TB Steam Deck – How much it costs, and why you should do it
When I purchased my Steam Deck, I went for the cheap option. I loved the idea of the system, but I didn’t want to invest in the pricier 256GB and 512GB options. First, I didn’t know how much I would use the system, and second, I knew that the system’s storage was installed using a M.2 2230 slot. From there, I knew that user upgrades would be possible, and that meant that I could save money in the long run if I purchased a 64GB Steam Deck and upgraded it later.
Earlier this month, Scan UK started selling Steam Deck compatible Western Digital SN740 SSDs, and that was the point when I realised that now was the time to upgrade.
Upgrade costs
Today, Scan UK sells Steam Deck compatible 512GB, 1TB, and 2TB Western Digital SN740 SSDs, M.2 2230 SSDs that can neatly fit within Valve’s portable gaming PC and not only give users ore storage, but faster storage speeds than the system’s stock M.2 drives. With prices of £49.98, £109.99, and £199.98 respectively (at the time of writing), these drives also offer gamers more value than Valve’s 256GB and 512GB Steam Deck models.
If you are willing to tinker with your Steam Deck, you can save a lot of money buying Valve’s 64GB Steam Deck upgrading your system’s storage yourself. While you will miss out on the 512GB model’s matte screen, you can get a 512GB model for £170 less, a 1TB model for £110 less than Valve’s 512GB model, or 2TB for £20 less than Valve’s 512GB model.
| Steam Deck (Alone) |
Steam Deck |
Steam Deck + 1TB SN740 SSD |
Steam Deck + 2TB SN740 SSD |
|
| 64GB eMMC Model | £349 | £399 | £459 | £549 |
| 256GB Model | £459 | – | – | – |
| 512GB Model | £569 | – | – | – |
Why Upgrade your Steam Deck’s SSD?
Out of the box, Valve’s Steam Deck supports game storage though MicroSD cards, so it could be argued that gamers don’t need to upgrade their Deck’s SSD and can simply utilise MicroSD cards for additional storage. While this is true, M.2 SSDs are faster than MicroSD cards, and 1TB and 2TB M.2 SSDs are much cheaper than single MicroSD cards with the same storage capacity.
With a upgraded SSD, Steam Deck users can benefit from faster internal storage as well as increased overall storage capacity. When compared to MicroSD cards, an upgraded M.2 SSD can offer Steam Deck users faster game loading times, which is great for those of us who want to get into our games quickly.
So why upgrade your Steam Deck’s SSD? The reasons are faster storage performance and increased storage capacity, both when compared to the Steam Deck’s stock storage, and MicroSD cards. The upgrade is also incredibly cost-effective, as shown above.

SSD Selection
Valve’s Steam Deck uses a M.2 2230 SSD, and it doesn’t have enough space inside to fit anything larger. M.2 2230 SSDs are 22mm wide and 30 mm long. That’s what is meant by M.2 2230.
The M.2 slot within Valve’s Steam Deck is a PCIe 3.0 x4 M.2 slot, which means that the slot is limited to speeds of around 3,500 MB/s. Faster PCIe 4.0 SSDs can use this slot thanks to PCIe backwards compatibility, though their speeds will be limited by the maximum throughout of the PCIe 3.0 x4 interface.
If you are buying a SSD for your Steam Deck, your primary concern is to make sure that your SSD is the right size. Most readily available M.2 SSD use the longer M.2 2280 (22mm wide, 80mm long) form factor, which is far to long for Valve’s Steam Deck.
Our SSD Choice
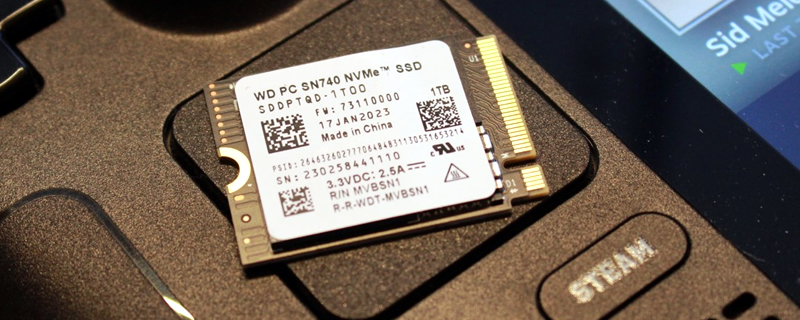
When upgrading our Steam Deck, we chose to use Western Digital’s PCIe 4.0 SN740 SSD, which is now available to purchase in the UK though Scan Computers. The reason behind this SSD selection was simple, it was a PCIe 4.0 SSD that could more than saturate the Steam Deck’s PCIe 3.0 M.2 interface, it was an M.2 2230 SSD, and it is more affordable than competing M.2 2230 SSD. Our decision was as simple as that.

The tools you need
To upgrade your Steam Deck, you will need a USB stick (either Type-C or with a Type-C adaptor), a pair of tweezers, a Philips head electronics screwdriver, and some plastic electronics opening picks.
Most hardware enthusiasts should have these tools already in your home, and if you don’t, they are available cheaply online.

Setting your Steam Deck’s battery into Storage Mode
To make your Steam Deck safe to disassemble, we recommended that you discharge your system’s battery to below 25% and then set the system into “Battery Storage Mode”. This mode will prevent your Steam Deck from a lot of power from the system’s battery until the system is next connected to power though its USB Type-C port.
To enter this mode, Steam Deck users should power off their system and then hit the system’s power and volume + buttons. Once the Steam Deck chimes, you can let go of both buttons and then enter the Steam Deck’s management menu. From here, Steam Deck users can enter the system’s “Setup Utility” section, as shown below. This can be done using the system’s touch screen or with the system’s control pad.

Once within the Steam Deck’s setup utility menu, users can then navigate to the system’s power menu and then select the system’s battery storage mode. Hit enter to utilise the Steam Deck’s battery storage mode.
Please note that Valve does not recommend entering the Steam Deck’s battery storage mode when the system’s battery is charged is above 80%.

After telling your system to enter battery storage mode, click yes to proceed and your Steam Deck will power down.
